^
vs. 喔,全能魔像

20

20

Strategy 3 of 9
Browse all alternatives

包括步驟

點擊按鈕去拷貝字串去你的剪貼板

ability(453)
ability(406) [self.round=2]
ability(814)
ability(406)
change(#2) [!self(#2).played]
change(#3)
ability(334) [self.round=1]
ability(779) [enemy(#1).dead & enemy(#2).dead]
ability(115)
喔,全能魔像 99880
Special or not:0Special or not:111211556865911550

技能 1 1 2
屬性: 任何

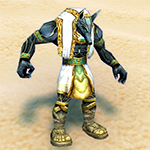
阿努比薩斯塑像
這隻寵物可以有以下品種:

屬性 生命 力量 速度
HH 1725 276 244


2 ZL 20 0

任何等級 20+ 寵物

Special or not:0Special or not:1122844648998440

技能 1 2 2
屬性: 任何

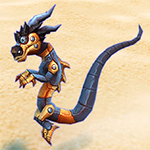
機械熊貓人幼龍
這隻寵物可以有以下品種:

屬性 生命 力量 速度
SS 1400 276 309


If you want to play it safe, use a level 25 rare pet in the second slot

多經驗值
至少要有一隻擁有該屬性才可以有成功率
RNG
不是每個攻略都是百發百中。這個就是會失敗的個案。你有可能要重新再挑戰,因為有很多隨機的因素讓你有機會失敗,千萬不要怪他們  (*≧ω≦)
這個攻略的寵物是從紙牌獎勵得到或者拍賣行高價寵物。
這攻略的寵物是從暴雪商城裡購買。
等級 20+
你可以利用這個攻略去給低級寵物獲得更多經驗。
有一些步驟比較複雜去跟隨,這個就是其中一個
Script
這攻略提供了script,你可以利用Pet Battle Script 插件去匯入。你點擊左邊按鈕可以拷貝字串。
起碼有一隻寵物已經絕版了。如果你有,恭喜你!
攻略作者已測試過認為非常適用還已經標記了讓他多點爆光率!
In Dragonflight Patch 10.2, the ability Time Bomb has been changed. This tag is marking strategies using Time Bomb so they can be reviewed.
Time: 2:38
This time was entered by a strategy curator. It is quite reliable especially when using TDScript, however times can always vary slightly.
Rounds: 19
The number of rounds for this fight were added by a strategy curator. This number is usually very reliable.
這是獲得經驗值的表格,是根據完成挑戰中有25等級的寵物加一個升級中寵物。
某些經驗值可能沒有被算進去

之前 之後 獲得經驗值
1135981
2136353
3146683
4146971
5147219
6157425
7157590
8167714
9167796
10177838
11177838
12187796
13197714
14197590
15207425
16207219
17216971
18226683
19226353
20235981
21235569
22245115
23253900
24251980

狩旅團之帽

小寵物點心

寵物點心

暗月禮帽

寵物對戰獎勵事件


=

將寵物等級提升至25級並最小化經驗損失的方法

=

獲得

Strategy Details
2 Min 38 Sec
This time was entered by a strategy curator. It is quite reliable especially when using TDScript, however times can always vary slightly.
19
The number of rounds for this fight were added by a strategy curator. This number is usually very reliable.
2022-08-13 17:08:39
The strategy was last updated on this date.
2017-03-04 23:32:22
The strategy was created on this date.
83,014
網頁被訪次數。
Tamer Details
Stormheim 48.3 44.8 (TomTom / Map Pin)
多經驗值
Turn 1

For the best display of your strategy, please follow these guidelines:

  • Use QuickFill elements where possible
  • Enter custom instructions in English
  • Check the Strategy Creation Guide for more info
阿努比薩斯塑像
碾碎
沙塵風暴
割裂
任何等級 20+ 寵物
機械熊貓人幼龍
吐息
雷霆箭
誘餌
Pass
Bring in your 阿努比薩斯塑像
Bring in your 機械熊貓人幼龍
Bring in your Level Pet
Swap to your 阿努比薩斯塑像
Swap to your 機械熊貓人幼龍
Swap to your Level Pet
迷你熔岩號 comes in
迷你秘法號 comes in
迷你雷電號 comes in
An enemy pet comes in
Any standard attack will finish the fight
 
阿努比薩斯塑像
Level Pet
機械熊貓人幼龍
碾碎
沙塵風暴
割裂
吐息
雷霆箭
誘餌
迷你雷電號
迷你秘法號
迷你熔岩號
Important: Please enter your instructions in English or a large parts of the community will not be able to read them.
Some typical sentences are translated automatically. Move your mouse over this part for more details.
The following strings are auto-translated if you enter them in the defined format. It is recommended to use them where possible:
[ability=123:Spellname] - [pet=123:Petname] dies
[ability=123:Name] - [enemy=123:Enemyname] dies
[ability=123:Name] until [pet=123:Petname] dies
[ability=123:Name] until [enemy=123:Enemyname] dies
Swap back to [pet=123:Petname]
[ability=123:Name] until the fight is won
Turn 2

For the best display of your strategy, please follow these guidelines:

  • Use QuickFill elements where possible
  • Enter custom instructions in English
  • Check the Strategy Creation Guide for more info
阿努比薩斯塑像
碾碎
沙塵風暴
割裂
任何等級 20+ 寵物
機械熊貓人幼龍
吐息
雷霆箭
誘餌
Pass
Bring in your 阿努比薩斯塑像
Bring in your 機械熊貓人幼龍
Bring in your Level Pet
Swap to your 阿努比薩斯塑像
Swap to your 機械熊貓人幼龍
Swap to your Level Pet
迷你熔岩號 comes in
迷你秘法號 comes in
迷你雷電號 comes in
An enemy pet comes in
Any standard attack will finish the fight
 
阿努比薩斯塑像
Level Pet
機械熊貓人幼龍
碾碎
沙塵風暴
割裂
吐息
雷霆箭
誘餌
迷你雷電號
迷你秘法號
迷你熔岩號
Important: Please enter your instructions in English or a large parts of the community will not be able to read them.
Some typical sentences are translated automatically. Move your mouse over this part for more details.
The following strings are auto-translated if you enter them in the defined format. It is recommended to use them where possible:
[ability=123:Spellname] - [pet=123:Petname] dies
[ability=123:Name] - [enemy=123:Enemyname] dies
[ability=123:Name] until [pet=123:Petname] dies
[ability=123:Name] until [enemy=123:Enemyname] dies
Swap back to [pet=123:Petname]
[ability=123:Name] until the fight is won
Turn 3

For the best display of your strategy, please follow these guidelines:

  • Use QuickFill elements where possible
  • Enter custom instructions in English
  • Check the Strategy Creation Guide for more info
阿努比薩斯塑像
碾碎
沙塵風暴
割裂
任何等級 20+ 寵物
機械熊貓人幼龍
吐息
雷霆箭
誘餌
Pass
Bring in your 阿努比薩斯塑像
Bring in your 機械熊貓人幼龍
Bring in your Level Pet
Swap to your 阿努比薩斯塑像
Swap to your 機械熊貓人幼龍
Swap to your Level Pet
迷你熔岩號 comes in
迷你秘法號 comes in
迷你雷電號 comes in
An enemy pet comes in
Any standard attack will finish the fight
 
阿努比薩斯塑像
Level Pet
機械熊貓人幼龍
碾碎
沙塵風暴
割裂
吐息
雷霆箭
誘餌
迷你雷電號
迷你秘法號
迷你熔岩號
Important: Please enter your instructions in English or a large parts of the community will not be able to read them.
Some typical sentences are translated automatically. Move your mouse over this part for more details.
The following strings are auto-translated if you enter them in the defined format. It is recommended to use them where possible:
[ability=123:Spellname] - [pet=123:Petname] dies
[ability=123:Name] - [enemy=123:Enemyname] dies
[ability=123:Name] until [pet=123:Petname] dies
[ability=123:Name] until [enemy=123:Enemyname] dies
Swap back to [pet=123:Petname]
[ability=123:Name] until the fight is won
Turns 4+
From now on, keep 沙塵風暴 always active.

For the best display of your strategy, please follow these guidelines:

  • Use QuickFill elements where possible
  • Enter custom instructions in English
  • Check the Strategy Creation Guide for more info
阿努比薩斯塑像
碾碎
沙塵風暴
割裂
任何等級 20+ 寵物
機械熊貓人幼龍
吐息
雷霆箭
誘餌
Pass
Bring in your 阿努比薩斯塑像
Bring in your 機械熊貓人幼龍
Bring in your Level Pet
Swap to your 阿努比薩斯塑像
Swap to your 機械熊貓人幼龍
Swap to your Level Pet
迷你熔岩號 comes in
迷你秘法號 comes in
迷你雷電號 comes in
An enemy pet comes in
Any standard attack will finish the fight
 
阿努比薩斯塑像
Level Pet
機械熊貓人幼龍
碾碎
沙塵風暴
割裂
吐息
雷霆箭
誘餌
迷你雷電號
迷你秘法號
迷你熔岩號
Important: Please enter your instructions in English or a large parts of the community will not be able to read them.
Some typical sentences are translated automatically. Move your mouse over this part for more details.
The following strings are auto-translated if you enter them in the defined format. It is recommended to use them where possible:
[ability=123:Spellname] - [pet=123:Petname] dies
[ability=123:Name] - [enemy=123:Enemyname] dies
[ability=123:Name] until [pet=123:Petname] dies
[ability=123:Name] until [enemy=123:Enemyname] dies
Swap back to [pet=123:Petname]
[ability=123:Name] until the fight is won
Use 割裂 when available.

For the best display of your strategy, please follow these guidelines:

  • Use QuickFill elements where possible
  • Enter custom instructions in English
  • Check the Strategy Creation Guide for more info
阿努比薩斯塑像
碾碎
沙塵風暴
割裂
任何等級 20+ 寵物
機械熊貓人幼龍
吐息
雷霆箭
誘餌
Pass
Bring in your 阿努比薩斯塑像
Bring in your 機械熊貓人幼龍
Bring in your Level Pet
Swap to your 阿努比薩斯塑像
Swap to your 機械熊貓人幼龍
Swap to your Level Pet
迷你熔岩號 comes in
迷你秘法號 comes in
迷你雷電號 comes in
An enemy pet comes in
Any standard attack will finish the fight
 
阿努比薩斯塑像
Level Pet
機械熊貓人幼龍
碾碎
沙塵風暴
割裂
吐息
雷霆箭
誘餌
迷你雷電號
迷你秘法號
迷你熔岩號
Important: Please enter your instructions in English or a large parts of the community will not be able to read them.
Some typical sentences are translated automatically. Move your mouse over this part for more details.
The following strings are auto-translated if you enter them in the defined format. It is recommended to use them where possible:
[ability=123:Spellname] - [pet=123:Petname] dies
[ability=123:Name] - [enemy=123:Enemyname] dies
[ability=123:Name] until [pet=123:Petname] dies
[ability=123:Name] until [enemy=123:Enemyname] dies
Swap back to [pet=123:Petname]
[ability=123:Name] until the fight is won
Use 碾碎 otherwise until your Idol dies.

For the best display of your strategy, please follow these guidelines:

  • Use QuickFill elements where possible
  • Enter custom instructions in English
  • Check the Strategy Creation Guide for more info
阿努比薩斯塑像
碾碎
沙塵風暴
割裂
任何等級 20+ 寵物
機械熊貓人幼龍
吐息
雷霆箭
誘餌
Pass
Bring in your 阿努比薩斯塑像
Bring in your 機械熊貓人幼龍
Bring in your Level Pet
Swap to your 阿努比薩斯塑像
Swap to your 機械熊貓人幼龍
Swap to your Level Pet
迷你熔岩號 comes in
迷你秘法號 comes in
迷你雷電號 comes in
An enemy pet comes in
Any standard attack will finish the fight
 
阿努比薩斯塑像
Level Pet
機械熊貓人幼龍
碾碎
沙塵風暴
割裂
吐息
雷霆箭
誘餌
迷你雷電號
迷你秘法號
迷你熔岩號
Important: Please enter your instructions in English or a large parts of the community will not be able to read them.
Some typical sentences are translated automatically. Move your mouse over this part for more details.
The following strings are auto-translated if you enter them in the defined format. It is recommended to use them where possible:
[ability=123:Spellname] - [pet=123:Petname] dies
[ability=123:Name] - [enemy=123:Enemyname] dies
[ability=123:Name] until [pet=123:Petname] dies
[ability=123:Name] until [enemy=123:Enemyname] dies
Swap back to [pet=123:Petname]
[ability=123:Name] until the fight is won
Bring in your Level Pet

For the best display of your strategy, please follow these guidelines:

  • Use QuickFill elements where possible
  • Enter custom instructions in English
  • Check the Strategy Creation Guide for more info
阿努比薩斯塑像
碾碎
沙塵風暴
割裂
任何等級 20+ 寵物
機械熊貓人幼龍
吐息
雷霆箭
誘餌
Pass
Bring in your 阿努比薩斯塑像
Bring in your 機械熊貓人幼龍
Bring in your Level Pet
Swap to your 阿努比薩斯塑像
Swap to your 機械熊貓人幼龍
Swap to your Level Pet
迷你熔岩號 comes in
迷你秘法號 comes in
迷你雷電號 comes in
An enemy pet comes in
Any standard attack will finish the fight
 
阿努比薩斯塑像
Level Pet
機械熊貓人幼龍
碾碎
沙塵風暴
割裂
吐息
雷霆箭
誘餌
迷你雷電號
迷你秘法號
迷你熔岩號
Important: Please enter your instructions in English or a large parts of the community will not be able to read them.
Some typical sentences are translated automatically. Move your mouse over this part for more details.
The following strings are auto-translated if you enter them in the defined format. It is recommended to use them where possible:
[ability=123:Spellname] - [pet=123:Petname] dies
[ability=123:Name] - [enemy=123:Enemyname] dies
[ability=123:Name] until [pet=123:Petname] dies
[ability=123:Name] until [enemy=123:Enemyname] dies
Swap back to [pet=123:Petname]
[ability=123:Name] until the fight is won
Turn 1

For the best display of your strategy, please follow these guidelines:

  • Use QuickFill elements where possible
  • Enter custom instructions in English
  • Check the Strategy Creation Guide for more info
阿努比薩斯塑像
碾碎
沙塵風暴
割裂
任何等級 20+ 寵物
機械熊貓人幼龍
吐息
雷霆箭
誘餌
Pass
Bring in your 阿努比薩斯塑像
Bring in your 機械熊貓人幼龍
Bring in your Level Pet
Swap to your 阿努比薩斯塑像
Swap to your 機械熊貓人幼龍
Swap to your Level Pet
迷你熔岩號 comes in
迷你秘法號 comes in
迷你雷電號 comes in
An enemy pet comes in
Any standard attack will finish the fight
 
阿努比薩斯塑像
Level Pet
機械熊貓人幼龍
碾碎
沙塵風暴
割裂
吐息
雷霆箭
誘餌
迷你雷電號
迷你秘法號
迷你熔岩號
Important: Please enter your instructions in English or a large parts of the community will not be able to read them.
Some typical sentences are translated automatically. Move your mouse over this part for more details.
The following strings are auto-translated if you enter them in the defined format. It is recommended to use them where possible:
[ability=123:Spellname] - [pet=123:Petname] dies
[ability=123:Name] - [enemy=123:Enemyname] dies
[ability=123:Name] until [pet=123:Petname] dies
[ability=123:Name] until [enemy=123:Enemyname] dies
Swap back to [pet=123:Petname]
[ability=123:Name] until the fight is won
Turn 2

For the best display of your strategy, please follow these guidelines:

  • Use QuickFill elements where possible
  • Enter custom instructions in English
  • Check the Strategy Creation Guide for more info
阿努比薩斯塑像
碾碎
沙塵風暴
割裂
任何等級 20+ 寵物
機械熊貓人幼龍
吐息
雷霆箭
誘餌
Pass
Bring in your 阿努比薩斯塑像
Bring in your 機械熊貓人幼龍
Bring in your Level Pet
Swap to your 阿努比薩斯塑像
Swap to your 機械熊貓人幼龍
Swap to your Level Pet
迷你熔岩號 comes in
迷你秘法號 comes in
迷你雷電號 comes in
An enemy pet comes in
Any standard attack will finish the fight
 
阿努比薩斯塑像
Level Pet
機械熊貓人幼龍
碾碎
沙塵風暴
割裂
吐息
雷霆箭
誘餌
迷你雷電號
迷你秘法號
迷你熔岩號
Important: Please enter your instructions in English or a large parts of the community will not be able to read them.
Some typical sentences are translated automatically. Move your mouse over this part for more details.
The following strings are auto-translated if you enter them in the defined format. It is recommended to use them where possible:
[ability=123:Spellname] - [pet=123:Petname] dies
[ability=123:Name] - [enemy=123:Enemyname] dies
[ability=123:Name] until [pet=123:Petname] dies
[ability=123:Name] until [enemy=123:Enemyname] dies
Swap back to [pet=123:Petname]
[ability=123:Name] until the fight is won
Turns 3+
吐息 away!

For the best display of your strategy, please follow these guidelines:
  • Use QuickFill elements where possible
  • Enter custom instructions in English
  • Check the Strategy Creation Guide for more info
阿努比薩斯塑像
碾碎
沙塵風暴
割裂
任何等級 20+ 寵物
機械熊貓人幼龍
吐息
雷霆箭
誘餌
Pass
Bring in your 阿努比薩斯塑像
Bring in your 機械熊貓人幼龍
Bring in your Level Pet
Swap to your 阿努比薩斯塑像
Swap to your 機械熊貓人幼龍
Swap to your Level Pet
迷你熔岩號 comes in
迷你秘法號 comes in
迷你雷電號 comes in
An enemy pet comes in
Any standard attack will finish the fight
 
阿努比薩斯塑像
Level Pet
機械熊貓人幼龍
碾碎
沙塵風暴
割裂
吐息
雷霆箭
誘餌
迷你雷電號
迷你秘法號
迷你熔岩號
Important: Please enter your instructions in English or a large parts of the community will not be able to read them.
Some typical sentences are translated automatically. Move your mouse over this part for more details.
The following strings are auto-translated if you enter them in the defined format. It is recommended to use them where possible:
[ability=123:Spellname] - [pet=123:Petname] dies
[ability=123:Name] - [enemy=123:Enemyname] dies
[ability=123:Name] until [pet=123:Petname] dies
[ability=123:Name] until [enemy=123:Enemyname] dies
Swap back to [pet=123:Petname]
[ability=123:Name] until the fight is won
Use 雷霆箭 if 迷你雷電號 is the only surviving enemy pet.

For the best display of your strategy, please follow these guidelines:

  • Use QuickFill elements where possible
  • Enter custom instructions in English
  • Check the Strategy Creation Guide for more info
阿努比薩斯塑像
碾碎
沙塵風暴
割裂
任何等級 20+ 寵物
機械熊貓人幼龍
吐息
雷霆箭
誘餌
Pass
Bring in your 阿努比薩斯塑像
Bring in your 機械熊貓人幼龍
Bring in your Level Pet
Swap to your 阿努比薩斯塑像
Swap to your 機械熊貓人幼龍
Swap to your Level Pet
迷你熔岩號 comes in
迷你秘法號 comes in
迷你雷電號 comes in
An enemy pet comes in
Any standard attack will finish the fight
 
阿努比薩斯塑像
Level Pet
機械熊貓人幼龍
碾碎
沙塵風暴
割裂
吐息
雷霆箭
誘餌
迷你雷電號
迷你秘法號
迷你熔岩號
Important: Please enter your instructions in English or a large parts of the community will not be able to read them.
Some typical sentences are translated automatically. Move your mouse over this part for more details.
The following strings are auto-translated if you enter them in the defined format. It is recommended to use them where possible:
[ability=123:Spellname] - [pet=123:Petname] dies
[ability=123:Name] - [enemy=123:Enemyname] dies
[ability=123:Name] until [pet=123:Petname] dies
[ability=123:Name] until [enemy=123:Enemyname] dies
Swap back to [pet=123:Petname]
[ability=123:Name] until the fight is won

Rerouting excess energy to Magmatron unit.
Engage flamethrower device.


kaysuella

發表在 2024-03-07 22:30:49

probably should be RNG-tagged as others have said, since idol can miss his own Crushes due to Sandstorm. Mine died before any enemy pets were dead

DragonsAfterDark

發表在 2024-03-08 08:18:05

RNG tag added for Sandstorm RNG.

kaysuella

發表在 2024-03-08 17:51:52

ty - its a good strat imo!! worked the second time no problem. sandstorm is just a double edged sword sometimes lol (edited)

Squirtis#1359

發表在 2018-01-15 11:43:17

Note: This is my first ever script, sorry if there are issues or if it doesn't work for you, but it worked for my team 3 times now. Goodluck

if [self(Anubisath Idol).active ]
ability(Sandstorm) [self(Anubisath Idol).ability(Sandstorm).usable ]
ability(Crush) [self.round=2 ]
ability(Rupture) [self(Anubisath Idol).ability(Rupture).usable ]
ability(Crush)
endif
change(Mechanical Pandaren Dragonling) [self(Anubisath Idol).dead]
if [self(Mechanical Pandaren Dragonling).active ]
ability(Decoy) [self(Mechanical Pandaren Dragonling).ability(Decoy).usable ]
ability(Thunderbolt) [enemy(Mini Electron).active & enemy(Mini Magmatron).dead & enemy(Mini Arcanotron).dead ]
ability(Breath)
endif

Drudois#1363

發表在 2022-09-15 12:58:14

Still works in SL

beo21

發表在 2022-09-05 09:37:20

9.2.7 working fine solo anub

Inwe

發表在 2022-03-02 20:08:36

Perfect

Gremlin64#1527

發表在 2021-10-15 16:54:09

Worked fine

Cloud

發表在 2021-07-18 22:13:02

Worked for me ,and lvled my pet some

Moos

發表在 2021-04-01 08:21:45

Anub died but Pandaren won. Leveling preferences wasn't set though, so my leveling pet died due to AoE damage.

Tejana

發表在 2020-12-02 03:51:04

My idol soloed it.

Zycke

發表在 2020-11-14 06:58:18

Did not work for me anymore either.

Taizun

發表在 2020-11-04 07:17:39

Strat is prone to RNG in 9.0 - might need to be tagged with RNG.

Shywillow

發表在 2020-10-21 03:03:18

strat didnt work for me (I also used the script), luckily my 3rd pet was a darkmoon zep so thunderbolt did the job with a couple of missiles for the mechanical one to finish it

in 9.0, strat still has bad RNG, I only just got through it after both dragon and idol were dead with a 25 lil rag (edited)

tagabar

發表在 2020-09-01 15:07:07

Strat itself did not work for me. I was able to win the fight however with my 3rd pet a lvl 20 kun-lai runt. Only had to use rampage and watched all 3 go down 1, 2, 3.

Billy 發表在 2018-03-26 00:39:21

I just tried this fight twice with this setup, it does not work well. Use alternative 2, it is the superior strategy for this fight.

Draagz

發表在 2020-08-07 11:02:06

Totally agree, thank you!!

Calimarina 發表在 2019-06-12 15:24:33

Strat didn't work for me. It took two Anubisath Idols to take them down. Didn't need my 3rd Anubisath Idol.

Coriliah#1676

發表在 2018-12-27 15:27:59

Worked perfectly, thanks!

mortavius

發表在 2018-09-09 01:38:13

This strat works, but it's very subject to RNG. If your attacks miss due to Sandstorm, and theirs hit (or even worse, crit) it can fail totally.

I did the fight twice; the first time all my pets died. I tried it again, exactly same composition, and my Idol soloed the entire thing. It all seems down to whether your Rupture attacks hit (and optimally, stun) or miss, and to a lesser extent, whether the Sandstorm causes the enemy attacks to miss at all.

I don't know if the other strats are better; the pets they use are all still low level for me. So, this one DOES work, but it might take a few tries.

Khes

發表在 2018-08-30 22:43:43

don't think this works any more with the MPD nerf

InThaKnow 發表在 2018-01-15 19:19:31

This does not work as of this date.

Aiobheal#1327

發表在 2018-01-15 19:26:48

Worked fine for me

Yas 發表在 2018-02-03 11:45:25

Works wonders for me as well :)

Calebreth 發表在 2018-02-09 10:04:17

Didn't work 3 times in a row for me. So it's either horrid RNG or its outdated.

Couchpotato 發表在 2018-03-08 18:06:23

Works but need a pet swap for the leveling pet added, otherwise might as well just add another max level pet.

Mergas 發表在 2018-03-13 23:49:04

Swap the leveling pet in on the MPD's Decoy. Sometimes the pet takes damage, but a 20+ usually survives. That is, if the strategy works. I often have to repeat it multiple times before finally winning.

Camlas

發表在 2018-06-04 06:48:35

If your MPD takes even a single direct crit this strat will fail. Fortunately, my leveling pet was able to finish off all three enemies, taking two direct hits in the process and surviving them.

SlyAnkleBiter

發表在 2018-07-29 20:00:37

This did not initially work for me. I finally tried using 'Rupture' first a day that made the strat work -- Anubisath Idol solod easily.

Khes

發表在 2018-04-05 21:31:14

anub just solo'd, fine strat

TSP 發表在 2018-03-13 15:40:09

It seems that certain days my Idol does good and certain days it just gets its but kicked. So I will usually have two Idols just in case one happens to have a bad day! lol

Elimae 發表在 2017-11-12 10:41:59

My blossoming ancient (BB) soloed this fight with 2,2,2
Open with Sunlight, then Photosynthesis, then use Ironbark until Sunlight is up again. Your rotation will always be:
Sunlight
Photosynthesis,
Ironbark
Ironbark
Ironbark
Ironbark
Rinse and repeat until all three are dead

Anonymous 發表在 2018-01-15 12:21:16

Thank you. I love this strat. Worked first time.

ghostsand

發表在 2018-02-28 14:16:32

ability(Sunlight:404)
ability(Photosynthesis:268) [self.round=2]
ability(Photosynthesis:268) [self.aura(Photosynthesis:267).duration<2]
ability(Ironbark:962)

Hruulrah - Aerie Peak 發表在 2017-07-22 13:21:20

Blossoming Ancient (2,2,2), Any Pet, Any Pet
-Sunlight
-Photosynthesis
-Ironbark till Sunlight comes off of Cooldown
*rinse and repeat till all are dead.

low level pet will not survive due to flame effect.

ghostsand

發表在 2018-02-28 14:16:05

td script for this

ability(Sunlight:404)
ability(Photosynthesis:268) [self.round=2]
ability(Photosynthesis:268) [self.aura(Photosynthesis:267).duration<2]
ability(Ironbark:962)

Incognito 發表在 2017-11-13 00:44:41

I needed a world quest pet battle for my Snowfeather Hatchling (2 2 2) questline which required I use two undead. I used the Unborn Valkyr (2 2 1) and Crawling Claw (2 1 1). Using Curse of Doom is great plus Haunt was the key.

Marco 發表在 2017-08-21 07:27:42

Everliving spore (1,1,1) is awesome at this fight, I know it's hard to get, but if you have it, give it a try. I used it as a second pet after Anubi died, skills: 3, 2, 1. Didn;t even have to use my dragonling.

Quintette 發表在 2017-08-17 00:36:13

The Idol is an absolute beast against these guys. It soloed the fight following the exact strat as described above and ended up with over 1000 HP left.

Sam 發表在 2017-04-10 06:43:56

Are there any changes in this fight with last patch?
My idol get fked like nothing, takes one crit after the other and dies in some rounds and not one omnitron is down before.

Anonymous 發表在 2017-04-10 15:06:00

Ouch. Same here. Just got spanked

Reedwand 發表在 2017-04-10 17:30:12

Same here, got myself churned out of that fight. Something has changed, the Idol doesn't hit like it used to so I would avoid using this strat :)

Modicus 發表在 2017-04-10 17:49:53

Yep, my idol was also destroyed as was my dragonling. Would have had to do it over had it not been for having a L23 leveling pet as my third. It was able to do enough to finish the fight.

Stantious 發表在 2017-04-10 17:58:54

Must be some unlucky crits, Idol almost solo'd the whole fight for me. Only 2 turns with of Mechanical PD to clean up.

Anonymous 發表在 2017-04-10 19:01:17

Worked perfect for me today. Idol almost soloed them all.

Anonymous 發表在 2017-07-14 21:01:18

Ok, this is obviously another one of the many RNG based strats on this site. Starting to wonder if these are even tested beyond. Ok, I won that fight lets move on to the next, no further testing required.

Santo 發表在 2017-07-22 20:15:29

Only the first time on this fight for me and I had to swap in my level pet to finish off because the Idol was going to clean up completely. Must be very RNG dependent but I guess I won't know until the next time....or the time after that...or.... :)

SnowWhite 發表在 2017-07-22 16:28:31

I accidentally started this fight with a Teroclaw Hatchling 222 and was able to easily solo it. Good option :)

Santo 發表在 2017-07-22 20:06:30

Well done, love those kind of mistakes :) He's not affectionately know as the "Super chicken" for nothing :)

Anonymous 發表在 2017-06-17 22:54:14

I wound up using Molten Corgi (2,2,2), Gleamhoof Fawn (1,1,2), and Teroclaw Hatchling (2,2,2), no switching.
Teroclaw wound up with near full health, and probably could have solo'd.

However what I did was:
Molten Corgi priority Inferno Herding > Cauterize > Flamethrower.
Gleamhoof fawn priority Bleat > Tranquility > Hoof.
This left Teroclaw starting fight at half health when all others were nearly dead.
Teroclaw priority is Dodge > Nature's Ward > Alpha Strike.
One strike a piece downed them all.

OMGKATFIGHT 發表在 2017-04-11 05:22:45

this is some bad RNG setup some crits from enemy team or 1-2 missed from the noobisath idol and you are restarting. Ended up worked on the 5th attempt

perveneficus 發表在 2017-06-17 07:00:54

You must have been very very unlucky. i have done the fight to day on 5 chars 2 of the fights sand storm missed and 1 even both missed. Still pandaren finishes it over with health to spare.

Anonymous 發表在 2017-04-20 08:28:57

worked perfect didnt even have to use my third pet

Thissx 發表在 2017-03-12 16:29:27

My Anubisath Idol was able to solo this.

OriginalNyla 發表在 2017-03-12 15:56:43

Worked like a charm for me, and it took my 3rd pet from lvl 23 to 25 (put him in for 1 decoy round).

FluffyOwner 發表在 2017-01-19 11:13:54

If you're doing the Falcosaur Quests and have the Bloodgazer quest and don't want to wait for another world quest it is possible to do this with Baby Elderhorn (2,2,2), Moon-Moon (1,2,1) and Bloodgazer (1,1,2).

No Switching, keep Slippery Ice and Call Blizzard up as long as possible. Elderhorn dies bring in Bloodgazer, Warning Squawk and Swarm till dead. Finish up with Moon-Moon. It requires some luck but I did it.

Fabinas 發表在 2017-01-19 12:22:56

I managed to do the Bloodgazer Team Rumble quest (Bloodgazer +2 Beast pets) with: Crystalline Broodling (1,1,1), Cinder Pup (2,2,1) and the Bloodgazer Hatchling (1,1,1)

-Rend
-Rend
-Burrow
-Drain Blood
-Rend -Broodling dies, enter Cinder Pup.
-Crouch
-Volcano
-Flame Breath till Cinder Pup dies, enter Bloodgazer
-Slicing Wind if opponent's HP>183 and NOT the Mechanical, else Falcosaur Swarm
-If used Slicing Wind last round, Falcosaur Swarm
If all goes well all opponent pets will die from Cinder Pup's Flame Breath DoT, Volcano Dmg and the swarmdmg+debuff. 2x Cinder Pups would do better, but i only had one levelled to 25.

Anonymous 發表在 2017-01-19 14:01:21

I didn't have any of the afrementioned pets leveled, so I used Cinder Pup (2,2,1) and Young Talbuk (2,2,2) followed by the hatchling. The hatchling still had >900 health when he entered the fight and falcosaur swarm finished them all off.

Jagûar

發表在 2017-02-20 10:51:44

Fabinas:
As Oh, Ominitron is up today, and I'm testing and making the strategies for the falcosaurs Team Rumble quests, I took the liberty to try out your suggestion. It worked perfect and I never even needed my Bloodgazer. I did have to replace your Crystalline Broodling with a Vicious Broodling as my Crystalline is only lvl 23 green, but it's the same skill set, yet different breed.
So next time you come around, you should see that specific strat here, with kudos to the right person.
Thank you.

For anyone else, feel free to send in your strategy suggestions to Xu-Fu :)

Risso 發表在 2016-11-21 18:43:13

Just solo with Teroclaw Hatchling (2,2,2)

Kate 發表在 2016-12-11 17:28:25

Works like a charm :) Thanks!

Sloober 發表在 2017-01-06 13:23:04

Start the fight with Unborn Val'kyr to end it quicker :)

Xna - Doomhammer 發表在 2017-01-19 03:41:44

Nice one. Teroclaw mops them up nicely. Thanks.

Schahmaar 發表在 2017-01-12 15:47:09

Jade Owl 1/2/2, Sharptalon Hatchling, Hyjal Wisp 2,1,1
- Cyclone
- Hawk Eye
- Slicing Wind until Owl dies
- Switch to Wisp
- Wish
- Evanescence
- Arcane Blast
(rinse and repeat)

This is very prone to RNG but it's once for the quest ;)

Kayz 發表在 2017-01-10 09:43:08

Has worked, but failed 3 times in a row today. They hit while I missed constantly with sandstorm.

User 發表在 2017-01-09 23:11:36

This wouldn't have worked if I didn't have my 2nd mechanical dragonling in there.

Anonymous 發表在 2017-01-06 15:42:30

I had a level 5 pet, brought it in when I put up decoy, easily works . Great strat

Lublha 發表在 2016-12-12 05:48:45

I used a Electrified Razortooth BB 212 with Paralyzing Shock that blocks the opponent

Lublha 發表在 2016-12-11 07:48:04

I used a Electrified Razortooth BB 212 with Paralyzing Shock that blocks the opponent

Badjoojoo - SOE 發表在 2016-11-16 20:01:36

Your strategy worked like a charm. I'd been trying to use the strat on WoWhead and nothing was working. I had the extra challenge of needing to have my Sharptalon dino baby in the mix for a quest. The Anubaseth Idol was PERFECT. Thank you!

Nyrio 發表在 2016-10-02 04:13:26

at what stage do i bring in the level pet ??

Gráinne

發表在 2016-10-03 01:28:13

I'm not sure how well level pets will do in this one, since the Sandstorm makes it quite RNG. If you want to try swapping in for levelling purposes, I suspect the best time would be just after your Idol dies, while Sandstorm is still up, then swap it out again immediately for the MPD.

I used this strat three times. First time, the MPD just about made it. Second time, both died, and I had to clean up with my backup level-25 pet. Third time, the Idol soloed it.

You are bringing your own RNG here with Sandstorm. It reduces your damage and gives you a miss chance just as much as it hampers Ominitron. :)

Voodoou 發表在 2016-10-27 12:00:48

I brought out my lvl pet when my anubisath died, gained a TON of xp (3375 w/o safari hat... realized after it wore off :()

Aranesh

發表在 2016-09-07 09:29:12

Hey everyone!
I now changed the order of the pets, starting with Anubisath, and increased the required level for the lowbie pet. There is a lot of RNG here sadly, but the strategy should work much better this way. I also added a few more alternatives.

Thank you very much for pointing out the flaws and required improvements!

Mord 發表在 2016-09-28 21:32:43

garbage strat, tried it 8 times in a row. never did kill one.

Nivmizzet 發表在 2016-09-27 04:20:43

Worked perfectly as of 09/27/16.

Fiamma29 發表在 2016-09-22 04:45:58

First time failed entirely, second time the Idol soloed. Save your Rupture for when Mini Electron is out.

fr0z3night 發表在 2016-09-22 00:34:09

Very RNG defendant fight, failed first run, easy second time, but interesting opponent, definitely want those 3 as pets

seneka09 發表在 2016-09-21 21:51:02

Idol took 'em all down.

Astrea 發表在 2016-09-21 02:21:04

Worked like a charm - my anubisath soloed it! Has it been nerved?

nes 發表在 2016-09-21 01:46:44

Yeah this strat didnt work for me, I tried with Chrominus as my 3rd pet ... all died with all three omnitrons still up. =/ Back to the drawing board I guess

Koltrak 發表在 2016-09-20 21:48:19

Worked fine on the first try. Maybe lucky cause i had Tarecgosa as level pet.
Maybe use Thunderbolt after Electron died once. That did the trick for me

Nettie 發表在 2016-09-07 06:58:26

Agree with the posters so far - starting with the carry pet didn't get me very far - I had better luck starting with an idol and ending with a high level carry pet that could go 2-3 rounds to clean up. (I had a lvl 23 infected squirrel).

Twilightcrescent 發表在 2016-09-07 06:36:39

I could not use this strategy at all. The anubisath idol and the dragonling both always died too early to protect a level 16 pet. I scrapped the whole thing and am working on a strategy that uses the Terrible Turnip instead. He has a nice water blast that works well hittin all of them, good survivability with his leech seed and the sons of the root lets him avoid damage while dishing it out to electron. It wasn't a perfect set up but I was able to use him, anubisath and a leveling pet.

Modreyn 發表在 2016-09-06 05:11:50

The dragon has a good attack, but not a good type. He gets wrecked by Electron I think it is, with his elemental attack. The idol also dies much quicker than it should, and the sandstorm seems to hinder more than help. For the moment I went with another L25 pet to clean up, just to get the reward, and took Sandstorm out of the rotation in favor of Stoneskin.

Aranesh

發表在 2016-09-07 05:11:48

The sandstorm is mostly to protect the backline pets as well from the AOE attacks.

Toeler 發表在 2016-09-07 01:30:02

Worked for me with a lvl 22 Lil' Deathwing as my level pet, finished with Anub and MPD on about 30% health each.

Anonymous 發表在 2016-09-06 20:57:17

Worked well enough, scrapped the idea of a carry pet and just threw in a third pet (in my case, Chrominus) who took two turns to mop up the remaining robot.

Amaryliss 發表在 2016-09-06 04:21:31

Worked for me although I used a random level 25 pet in place of the levelling pet (because my highest was level 11). My random pet just came in for 1 attack turn at the end and was still on high health when I won.

Terki 發表在 2016-09-02 00:34:43

Above didn't work for me, but I did swap the leveling pet with Idol's 2nd place position, Idol dies, switch to leveling pet then to your MPD.

Mindex 發表在 2016-09-05 19:59:13

Starting with Idol worked for me. Managed to get them all to <30% before Idol died making it easy to finish them of with MPD and also switching in leveling pet.

Plex 發表在 2016-09-06 03:20:33

This worked for me too.

Mini 發表在 2016-09-02 21:59:06

This strat works perfectly! I didn't even have to use my other pets. Anubisath Idol soloed the entire thing!

Camci 發表在 2016-09-05 23:32:36

Yea that has to be bullshit, no way.

Jane 發表在 2016-09-06 03:01:39

Actually no, I tried the first time - got completely wrecked, all 3 pets dead. 2nd time Anub solo'd as well, some heavy RNG going on here :/

Xenoprime 發表在 2016-09-06 02:50:27

Made it with the combo as indicated by Xufu - but the RANDOM lvl 15 pet was 20 H/H and had to do dmg in the end. Had only 1 crit during whole fight so should be reproducible. Team during Execution:
CorehoundPub (20) > had bonus damage VS mechanical which was the last surviving
Anubisash(25)
MPD (25)

Modreyn 發表在 2016-09-06 02:48:45

The dragon has a good attack, but not a good type. He gets wrecked by Electron I think it is, with his elemental attack. The idol also dies much quicker than it should, and the sandstorm seems to hinder more than help. For the moment I went with another L25 pet to clean up, just to get the reward, and took Sandstorm out of the rotation in favor of Stoneskin.

Sam 發表在 2016-09-05 23:52:19

No chance with that comp, after 5 trys the hole team has everytime between 30-50% hp left.
My anub dies in 3-4 hits.
I definitely had anub go first + another 25er pet in 3rth slot, otherwise no chance.

Vishkal 發表在 2016-09-03 05:37:02

I had better luck with this when I didn't bother with a carry and brought 2 Anubisath Idols. Because of all the RNG between the enemies swapping randomly and the Idol's tendency for variance between crush and the 10% miss chance I just couldn't get it to work with only one.

Aranesh

發表在 2016-09-03 02:22:28

Hey everyone!
I sadly cannot test this fight currently. If you have specific suggestions for other pets to use, or how to improve this one, please let me know! I would very much like to make this work :-)

Ndianagnomes/Etts of ettspets 發表在 2016-09-03 00:02:48

Seems to be some RNG here. My Idol didn't make it and neither did my Dragon. Luckily my leveling pet was a level 23 and cleaned up. I'll mess with it more though. Good strat!

Zaymaa 發表在 2016-09-02 21:21:37

Third try and still dying.

Darge 發表在 2016-09-02 20:35:55

Tried the above strat twice, didn't work either time. Seems to be a lot of RNG as the 2nd time the Anubisath Idol was dead and did hardly any damage at all. Tried it again swapping MPD with an Emerald Proto Drake and that worked fine, except the leveling pet didn't survive the aoe attacks.

Alcippe 發表在 2016-09-02 20:01:02

I also put Idol first. When Idol died I switched to MPD then finally level pet. This BARELY got me to win with a 23 Mud Jumper as the final pet (Water Jet/Bubble)

新留言


姓名:

連結: