
攻略提供者是 MejDej#2623
4
4
|
平均評分: |
2.8 |
|
評分: |
18 |
|
你的投票: |
|
Creator |
||||||||||
|---|---|---|---|---|---|---|---|---|---|---|
|
Tags
Filter strategies:
|
|||||||||
| 1 | 

|

Easy and reliable, takes 16-18 rounds.
|
Script |
2 | 5.0 |
53 |
144
2:24
|
18 | ||
| 2 |


|
16 rounds.
|
Script |
2 | 4.9 |
36 |
137
2:17
|
16 | ||
| 3 | 


|
I tested this multiple times with the listed breeds and it worked every time! Unfortunately I do not have other breeds to test those as well. Let me know if others work!
The goal is to maximize damage to the 3rd leftovers while effectively managing the first 2 pets |
屬性 商店 |
2 | 4.7 |
12 |
128
2:08
|
15 | ||
| 4 | 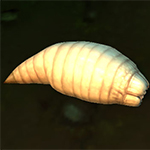

|
Kinda RNG due to 咬嚼's variable damage.
Recent attempts seemed to require HH worms, may just have been RNG tho Thx to Deathrall for td script |
RNG Script |
2 | 4.6 |
13 |
123
2:03
|
15 | ||
| 5 |

|
This is Drakkhul's excellent strategy, found in the comments for Lazey's. It's somewhat RNG dependent. Like that's a surprise. Not.
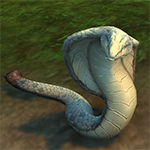
In particular, the initial Bone Barrage really needs to hit only once for this to have a hope of working: your Cobra must survive to get the two hits in on his second pet. If your Cobra does not survive, forfeit, bandage and try again. I used an HP Marmot, in theory any breed should do. |
屬性 RNG Script |
2 | 4.6 |
8 |
145
2:25
|
17+ | ||
| 6 | 

|
*** Created on Beta, so maybe not final ***
I'm using the new SL pet 銅毛幼狐 from Bastion. I think it's okay to use this wild catch because Bastion will be the first zone you'll need to play through for the campaign so you can't really miss/skip it. Be prepared to repeat the strategy on enemy crits. The last pet is ridiculously strong right now and I need 2 pets alive to split its 幽能風暴 to stand a chance. The goal is to kill 1st enemy with the fox, speed up my team and survive long enough to deal enough damage so the Copperfur Kit only needs 1x 抓傷 to trigger 屍爆術 at 30% enemy Health, then prepare the instant kill that this pet brings the move-set for. |
屬性 RNG Script |
2 | 4.1 |
7 |
115
1:55
|
14 | ||
| 7 | 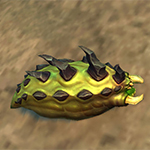
|
RNG |
2 | 4.4 |
3 |
147
2:27
|
17-19 | |||
| 8 | 


|
There's some RNG in here, even you do less damage or leftovers do more than usual. The idea is to be able to get to the undead phase on the 3rd leftovers with Survival active when he enters the undead phase.
It might need a few tries since is tied to the RNG of your Chomp damage and the leftovers. I've tried 4 times and got them in 2 of them but it's the fun of the RNG gods on us. |
RNG |
2 | 4.0 |
1 |
123
2:03
|
15 | ||
| 9 |
|
|
RNG |
2 | 4.0 |
1 |
144
2:24
|
18 | ||
| 10 |
|
RNG |
2 | 3.3 |
1 |
140
2:20
|
16+ | |||
| 11 |
|
A little bit of RNG but should work.
Comment your results and strat upgrage! |
屬性 RNG |
2 | 2.8 |
4 |
125
2:05
|
15+ | ||
| 12 |

|
This is what did worked for me. Its pretty much rely on luck that your Alpine Foxling will do 3 Attacks per Round. Good Luck you all!
|
屬性 RNG |
2 | 2.8 |
3 |
140
2:20
|
16+ | ||
| 13 |

|
RNG |
2 | 2.3 |
1 |
150
2:30
|
17+ |
包括步驟


Substitutes:
1 / 2

A little bit of RNG but should work.
Comment your results and strat upgrage!
| 之前 | 之後 | 獲得經驗值 | |
|---|---|---|---|
| 1 | ➜ | 3 | 239 |
| 2 | ➜ | 4 | 254 |
| 3 | ➜ | 4 | 267 |
| 4 | ➜ | 5 | 279 |
| 5 | ➜ | 6 | 289 |
| 6 | ➜ | 6 | 297 |
| 7 | ➜ | 7 | 304 |
| 8 | ➜ | 8 | 309 |
| 9 | ➜ | 9 | 312 |
| 10 | ➜ | 10 | 314 |
| 11 | ➜ | 11 | 314 |
| 12 | ➜ | 12 | 312 |
| 13 | ➜ | 13 | 309 |
| 14 | ➜ | 14 | 304 |
| 15 | ➜ | 15 | 297 |
| 16 | ➜ | 16 | 289 |
| 17 | ➜ | 17 | 279 |
| 18 | ➜ | 18 | 267 |
| 19 | ➜ | 19 | 254 |
| 20 | ➜ | 20 | 239 |
| 21 | ➜ | 21 | 223 |
| 22 | ➜ | 22 | 205 |
| 23 | ➜ | 23 | 185 |
| 24 | ➜ | 24 | 163 |
|
狩旅團之帽 |
|
|
小寵物點心 |
|
|
寵物點心 |
|
|
暗月禮帽 |
|
|
寵物對戰獎勵事件 |
|
= |
將寵物等級提升至25級並最小化經驗損失的方法 |
|
|
= |
獲得 |
|
For the best display of your strategy, please follow these guidelines:


For the best display of your strategy, please follow these guidelines:
 亂舞 until first Leftovers die
For the best display of your strategy, please follow these guidelines:
 炫光之舞 in undead turn
For the best display of your strategy, please follow these guidelines:
For the best display of your strategy, please follow these guidelines:
For the best display of your strategy, please follow these guidelines:
For the best display of your strategy, please follow these guidelines:
 蟲群 should hit Leftovers eyeball
For the best display of your strategy, please follow these guidelines:
For the best display of your strategy, please follow these guidelines:
For the best display of your strategy, please follow these guidelines:
 塵霧之雲 to dodge last hit in undead round
For the best display of your strategy, please follow these guidelines:

They say, if you take apart a machine and put it back together, there's always some screws left over. This should not be applied to living organisms!


 蜷伏
蜷伏 鑽地
鑽地
4
Alauraa#2331
發表在 2020-12-27 11:01:34
0
Xxxxx 發表在 2021-01-05 12:39:38
1
Holy#12384
發表在 2022-08-21 14:11:48
3
Drexel
發表在 2021-04-02 13:06:49
1
Holy#12384
發表在 2022-08-21 14:10:51
2
snipster#11323
發表在 2021-02-13 21:40:27
2
DTJames
發表在 2020-12-27 15:55:48
If you don't get 2 Flurry on 2nd pet before fox dying, Recommended using Mini-Tank Scratch first then Swarm to force it suicide. Otherwise it will die then suicide twice during undead round. (edited)
4
emersonrp
發表在 2020-12-07 20:59:36
1
NiteOwlsWife#1775
發表在 2020-12-09 23:18:18
SS Fox
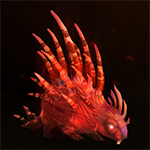
HP Silithid
HH Marmot
I died several times until I read this comment. Moving the "Dazzling Dance" to turn 1 then follow as written worked for me on 1st try. Thank you!!
1
elfinpcc
發表在 2020-12-19 17:11:55
1
Moe#12911
發表在 2020-11-30 01:39:12
1
Toabo
發表在 2020-12-05 01:31:46
1
meanieface#1856
發表在 2020-12-07 12:55:15
1
Lilianne
發表在 2020-12-05 03:09:22
1
DkPheonix#1938
發表在 2020-12-05 02:19:31
0
Anonymous 發表在 2020-12-04 06:39:12
edit2: Tried B/B Fox twice, also failed. Changed Fox to Worg Pup (only available as H/H) (saw it mentioned in another comment). Still failing to undead round of the last enemy because Burrow doesn't kill it while it is debuffed from Swarm (Eyeball Leftover gets hit by 2nd wave of Swarm with Beast buff -> three hits each 131 and even if one of them crits for 196 Burrow won't kill it).
edit3: Tried Worg Pup a few more times. Got 1 really lucky(?) try where my Worg Pup only died exactly the same turn as the second enemys undead turn ended (Yes the Worg killed the first 2 enemys solo). This made it possible for my Silithid to use Swarm wave 1 and 2 on the Eyeball Leftover, but even with a max roll Burrow (unless it crit) wouldnt have killed it. (edited)
2
Sylux#2941
發表在 2020-12-01 15:44:39
2
Rascallycat
發表在 2020-11-29 17:58:56
2
Markolious
發表在 2020-11-29 16:03:31
新留言