
Estratégia adicionada por ghostpets
|
Média de Avaliação: |
5 |
|
Avaliações: |
1 |
|
Seu voto: |
|
Creator |
||||||||||
|---|---|---|---|---|---|---|---|---|---|---|
|
Etiquetas
Filter strategies:
|
|||||||||
| 1 | 
Qualquer Nível 1+ Mascote
Qualquer Nível 1+ Mascote
|

Quick way to level two pets at a time. They can be level 1, neither of them take damage. This gives you plenty of flexibility when it comes to what pets you want to level, and are less likely to waste potential xp on pets that are already in their 20s.
Shadowlands Update: I've updated the strategy. Something changed with prepatch and Slow Moe dies quicker than he used to. I've added a Pass in order to better line up Prowl and Feed with Snot's Dive. However, if Xu-Fu crits Slow Moe with Feed, you may be in some trouble now, as Feed may not be available again for Snot. I've updated the TD script, but I think you may need a bandage around 25% of the time now [the chance Headbutt stuns you], and there's even a slim chance for Xu-Fu to die. [That can happen IF you crit Slow Moe with Feed, one shotting him, and then Snot rolls high with Dive and it deals a critical hit. Then you don't crit with Bite, and die one turn before Feed is available again.] |
Nível 1+ Script |
2 | 5.0 |
61 |
97
1:37
|
16-17 | ||
| 2 | 

Qualquer Nível 1+ Mascote
|
Reprint. Create by yzjj.
|
Raça (breed) Nível 1+ Script |
2 | 5.0 |
32 |
60
1:00
|
9 | ||
| 3 | 
Qualquer Nível 1+ Mascote
|
Average time :57S
|
Nível 1+ Script Seleção da Equipe |
2 | 4.9 |
89 |
52
0:52
|
8 | ||
| 4 | 
Qualquer Nível 1+ Mascote

Qualquer Mascote
|
Nível 1+ Script |
2 | 4.8 |
18 |
115
1:55
|
19+ | |||
| 5 | 
Qualquer Nível 1+ Mascote
|
9 rounds.
|
Nível 1+ Script |
2 | 5.0 |
7 |
71
1:11
|
9 | ||
| 6 | 

Qualquer Nível 1+ Mascote
|
Raça (breed) Nível 1+ Script |
2 | 5.0 |
5 |
57
0:57
|
8 | |||
| 7 |
Qualquer Nível 1+ Mascote
Qualquer Nível 1+ Mascote
|
I like this strategy and WQ because it's very repeatable, only requiring healing every few battles as well as having the option to level more than 1 pet at a time!
Great for pet battle weekly event, as well as character XP (About 50% character XP per hour) Inspired by Nyari =] |
Nível 1+ Script |
2 | 3.7 |
4 |
125
2:05
|
22+ | ||
| 8 | 
Qualquer Nível 1+ Mascote
|
Took a while for the BfA pets to be available here so I couldn't publish this strategy earlier. Still using Teroclaw but I think to start with Trecker can shorten the fight a bit (usually 12 rounds if he survives the first two enemy pets).
I recommend using the script for more efficient usage of Ravage. |
Nível 1+ Script |
2 | 5.0 |
1 |
89
1:29
|
14 | ||
| 9 | 
Qualquer Nível 1+ Mascote
|
|
Nível 1+ Script |
2 | 5.0 |
0 |
92
1:32
|
15 | ||
| 10 | 
Qualquer Nível 1+ Mascote
|
|
Nível 1+ Script |
2 | 5.0 |
0 |
130
2:10
|
20+ | ||
| 11 | 
Qualquer Nível 1+ Mascote
|
Fight Time using the TD Script as measured by the Pet Battle Log Keeper add-on:
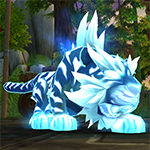
1:03 - 1:07 on 11 rounds ~75% of the time (when not stunned). 1:12 - 1:16 on 12-13 rounds ~22% of the time (when stunned). 1:19 - 1:30(?) on 13-14 rounds(?) ~3% of the time (when stunned and bad crit RNG causes your Pup to die before killing enemy #2). This strategy is built for top speed, good reliability, and flexibility for the slot #3 pet. Although the TD Script appears long and bloated, it handles different RNG scenarios with various finisher pets in slot #3. Pet substitutions: Slot #1 - Filhote de Lobo do Gelo, Filhote de Éter Perdido, or Filhotinho Marcado pelo Caos can be used here. Slot #3 - Any pet that will finish off enemy #3 in 2 turns works well here. Since there are too many to list here, I have compiled a partial list of 2-turn finishers in the comments section below. The TD Script should be compatible with them all. |
Nível 1+ Script |
2 | 5.0 |
0 |
69
1:09
|
11-12 | ||
| 12 | 
Qualquer Nível 1+ Mascote
|
Time: ~1:11 (11rounds)
Inspired by Rosqo's PVP Pet Battles . |
Raça (breed) Nível 1+ Script |
2 | 5.0 |
1 |
72
1:12
|
11 | ||
| 13 |
Qualquer Nível 1+ Mascote

|
Fight Time: 1:25 - 1:30 on ~14 rounds (with PP Iron Starlette)
A PP breed Iron Starlette (341 power) is optimal for this strategy. A PS, PB, or HP breed can get the job done, but they slower, less reliable, and not recommended. |
Raça (breed) Nível 1+ Script |
2 | 5.0 |
0 |
89
1:29
|
14+ | ||
| 14 | 

Qualquer Nível 1+ Mascote
|
Hello,
This strategy and are TD Script are made from nogulpfrog strategy guide. I just modified the pet and add little things on TD Script. For 100% win, i recommand to choose the nogulpfrog stratégy guide. This is an alternative if you don't have "Baby Ape" and "Unborn Val'kyr" or if you want to create many team for levelling pet sessions (like i do). This stratégy not work at 100%, sometime the "Darkmoon Monkey" take critical hit or is stuned by "Slow Moe". If that happens, the game will be lost. |
Aleatório Nível 1+ Script |
2 | 5.0 |
1 |
71
1:11
|
10 | ||
| 15 | 

Qualquer Nível 1+ Mascote
|
You could also substitute a Dragonete Mecânico Pandarênico for the Zepelim de Negraluna. Just make sure to not Explodir unless Snot's health is 560 or less.
|
Nível 1+ Script |
2 | 5.0 |
0 |
80
1:20
|
12 | ||
| 16 |
Qualquer Nível 1+ Mascote
|
|
Nível 1+ Script |
2 | 5.0 |
1 |
85
1:25
|
14 | ||
| 17 |
Qualquer Nível 1+ Mascote
|
Loja Nível 1+ Script |
2 | 5.0 |
2 |
57
0:57
|
9 | |||
| 18 |
Qualquer Nível 1+ Mascote
|
Nível 1+ Script |
2 | 5.0 |
0 |
104
1:44
|
15 | |||
| 19 |
Qualquer Nível 1+ Mascote

|
Your Gorm Harrier can take 1 crit
|
Nível 1+ Script |
2 | 5.0 |
1 |
66
1:06
|
9 | ||
| 20 |
Qualquer Nível 1+ Mascote
|
9 rounds.
|
Nível 1+ Script |
2 | 4.3 |
3 |
66
1:06
|
9 | ||
| 21 | 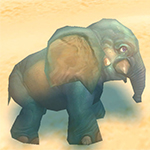
Qualquer Nível 1+ Mascote
Qualquer Nível 1+ Mascote
|
Strat posted by Aranesh on the Magic pet Family Familiar page and credit to Mistmeddler for the upgrade to wq.
This fight is infinitely repeatable whenever the wq is up and gives high xp which makes it a great alternative to Squirt on Sign of the Critter weeks. |
Nível 1+ Script |
2 | 4.0 |
0 |
102
1:42
|
17+ | ||
| 22 |
Qualquer Nível 1+ Mascote
|
Tested in SL Live.
Iron Starlette: H/P Other breeds untested Leveling pet can be anything, takes no damage. Tested 5+ times without issue. Double-stun from Slow Moe (25% chance to stun, uses ability 2x before death) along with several enemy crits could potentially cause issues, but not a situation I encountered. |
Script |
2 | 0.0 |
0 |
146
2:26
|
22 | ||
| 23 |
Qualquer Nível 1+ Mascote
|
Finally i have the opportunity to use the best beast pet in the game. ;)
Trunks is not crucial to the strategy. Anything wird hard hitting beast abilities can take it's place. Average fight time: 1:20 (1:15 best case scenario, 1:25 worst case) You can also see the strategy in a video. |
Nível 1+ Script |
2 | 0.0 |
0 |
76
1:16
|
11 | ||
| 24 |
Qualquer Nível 1+ Mascote
|
TD script updated for 9.0.1. Combined the fast fight by Lazey, with the no heal fight by Nyari, so you can keep fighting till you can heal.
|
Nível 1+ Script |
2 | 0.0 |
0 |
100
1:40
|
14+ | ||
| 25 | 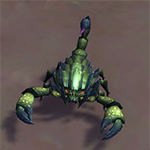
Qualquer Nível 1+ Mascote
|
This keeps Great Sting on the enemy team for the entire fight, killing the annoying backline pets before they even see combat and avoiding damage from Rocklick's shield.
The fight even goes a little better if you start with an injured Deathsting Scorpid, which will get its Beast racial damage bonus later in the fight. This strat can save you half the bandages when grinding Odrogg. |
Nível 1+ Traiçoeiro |
2 | 0.0 |
0 |
90
1:30
|
12-13 | ||
| 26 |
Qualquer Nível 1+ Mascote
|
Nível 1+ Script |
2 | 0.0 |
0 |
89
1:29
|
14 |
Incl. passos:


Qualquer Nível 1+ Mascote


Substitutos:
1 / 3
1 / 3
Fight Time using the TD Script as measured by the Pet Battle Log Keeper add-on:
1:03 - 1:07 on 11 rounds ~75% of the time (when not stunned).
1:12 - 1:16 on 12-13 rounds ~22% of the time (when stunned).
1:19 - 1:30(?) on 13-14 rounds(?) ~3% of the time (when stunned and bad crit RNG causes your Pup to die before killing enemy #2).
This strategy is built for top speed, good reliability, and flexibility for the slot #3 pet. Although the TD Script appears long and bloated, it handles different RNG scenarios with various finisher pets in slot #3.
Pet substitutions:
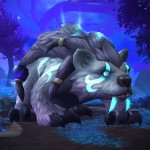
Slot #1 - Filhote de Lobo do Gelo, Filhote de Éter Perdido, or Filhotinho Marcado pelo Caos can be used here.
Slot #3 - Any pet that will finish off enemy #3 in 2 turns works well here. Since there are too many to list here, I have compiled a partial list of 2-turn finishers in the comments section below.
The TD Script should be compatible with them all.
| Antes | Depois | Ganho de Experiência | |
|---|---|---|---|
| 1 | ➜ | 13 | 5981 |
| 2 | ➜ | 13 | 6353 |
| 3 | ➜ | 14 | 6683 |
| 4 | ➜ | 14 | 6971 |
| 5 | ➜ | 14 | 7219 |
| 6 | ➜ | 15 | 7425 |
| 7 | ➜ | 15 | 7590 |
| 8 | ➜ | 16 | 7714 |
| 9 | ➜ | 16 | 7796 |
| 10 | ➜ | 17 | 7838 |
| 11 | ➜ | 17 | 7838 |
| 12 | ➜ | 18 | 7796 |
| 13 | ➜ | 19 | 7714 |
| 14 | ➜ | 19 | 7590 |
| 15 | ➜ | 20 | 7425 |
| 16 | ➜ | 20 | 7219 |
| 17 | ➜ | 21 | 6971 |
| 18 | ➜ | 22 | 6683 |
| 19 | ➜ | 22 | 6353 |
| 20 | ➜ | 23 | 5981 |
| 21 | ➜ | 23 | 5569 |
| 22 | ➜ | 24 | 5115 |
| 23 | ➜ | 25 | 3900 |
| 24 | ➜ | 25 | 1980 |
|
Chapéu de Safari |
|
|
Petisco Menor |
|
|
Petisco |
|
|
Chapéu Darkmoon |
|
|
Pet Battle Week |
|
= |
Níveis de animal de estimação para 25 com perda mínima de XP |
|
|
= |
XP adicional acima do nível 25 é perdido |
|
Para melhor exibição da sua estratégia, por favor siga estas orientações:


Para melhor exibição da sua estratégia, por favor siga estas orientações:
Para melhor exibição da sua estratégia, por favor siga estas orientações:
Para melhor exibição da sua estratégia, por favor siga estas orientações:
Para melhor exibição da sua estratégia, por favor siga estas orientações:
Para melhor exibição da sua estratégia, por favor siga estas orientações:
Para melhor exibição da sua estratégia, por favor siga estas orientações:
Para melhor exibição da sua estratégia, por favor siga estas orientações:
Para melhor exibição da sua estratégia, por favor siga estas orientações:
Para melhor exibição da sua estratégia, por favor siga estas orientações:
Para melhor exibição da sua estratégia, por favor siga estas orientações:
Para melhor exibição da sua estratégia, por favor siga estas orientações:
 Dominância / finisher #1 (refer to comments section for attack used)
Para melhor exibição da sua estratégia, por favor siga estas orientações:
 Cabeçada / finisher #2 (refer to comments section for attack used)
Para melhor exibição da sua estratégia, por favor siga estas orientações:
Para melhor exibição da sua estratégia, por favor siga estas orientações:

Escalar montanhas é sempre bom, mas esse cara é um habitante das cavernas!

 Uivar
Uivar Arrebentar
 Morder
1
zag213
escreveu em 2020-08-07 17:44:57
This makes this a better fight on bonus week then squirt. (not inc the small downtime between battles, this makes it 2m5s to level a pet on bonus week)
1
(OP) ghostpets
escreveu em 2019-09-18 20:56:01
Notes:
- The 2-turn finisher combos listed below assume that your Pup in slot #1 has killed the first two enemies and has hit enemy #3 with one Bite to 1226, 1211, or 1196 or less health (~97% success rate).
-If you are unlucky and your Pup in slot #1 dies on enemy #2 (happens ~3% of the time maybe, due to a combination of getting stunned and taking a big crit), then you may either forfeit the fight or attempt to win it. If attempting to win the fight, use only your #1 slot attack until enemy #2 dies and enemy #3 gets hit to 1226 or less health (i.e. – don't use your cooldowns until enemy #3's health is 1226 or lower).
- Usually, you will be switching pets while Snot (enemy #3) uses Dive and can't be attacked. But if Dive happens while your #3 slot pet is active, then pass the turn (three exceptions: Prowl, Supercharge, or Dominance should be used here).
- If this is all too confusing to you, then you could just use the TD Script provided. The TD Script should handle everything automatically for all the pets listed below. Let me know if anything isn't working in the script so I can try to fix it.
- Formatting is: Pet Name (breeds) (skillset) – finisher #1 > finisher #2
-----
Bonebiter (1-x-1) – Rampage > Rampage
Chrominius (1-1-2) – Howl > Surge of Power
Curious Wolvar Pup (2-x-2) – Maul > Bite
Darkshore Cub (PP breed only) (1-x-1) – Maul > Bite
Eldritch Manafiend (1-2-2) – Soulrush > Surge of Power
Flayer Youngling (PP breed only) (2-x-2) – Rampage > Rampage
Frostwolf Pup (1-2-1) – Howl > Maul
Grumpy (2-1-1) – Superbark > Bite
Hogs (2-x-2) – Maul > Bite
Kelp Scuttler (PP breed only) (1-x-2) – Rip > Blood in the Water
Kun-Lai Runt (PP breed only) (1-x-1) – Rampage > Rampage
Lord Woofington (1-1-1) – Superbark > Bark
Lost Netherpup (1-2-1) – Howl > Maul
Menagerie Custodian (HP breed only) (1-1-2) – Shock and Awe > Ion Cannon
Microbot 8D (2-2-2) – Supercharge > Ion Cannon
Microbot XD (2-2-2) – Supercharge > Ion Cannon
Muskflank Calfling (2-1-2) – Dominance > Headbutt
Ragepeep (any breed) (1-2-1) – Headbutt > Maul
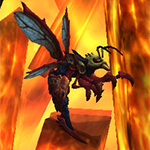
Ravager Hatchling (any breed) (1-x-2) – Rampage > Rampage
Restored Revenant (1-2-2) -- Roar of the Dead > Ghostly Bite
Saurolisk Hatchling (1-x-1) – Rampage > Rampage
Shadowback Crawler (PP breed only) (2-1-2) – Headbutt > Call Darkness
Trecker (1-2-1) – Prowl > Rampage
Void-Scarred Pup (1-2-1) – Howl > Maul
Xu-Fu, Cub of Xuen (1-1-2) – Prowl > Feed (Will usually heal to full health)
Young Talbuk (PP breed only) (1-x-2) – Rampage > Rampage
Zandalari Footslaher (PP, PS, PB breeds) (1-x-1) – Bite > Bloodfang
Zandalari Kneebiter (PP, PS, PB breeds) (1-x-2) – Bite > Bloodfang
Zandalari Toenibbler (PP, PS, PB breeds) (1-x-1) – Bite > Bloodfang
Zao, Calfling of Niuzao (2-1-2) – Dominance > Headbutt
-----
(edited)
1
(OP) ghostpets
escreveu em 2019-09-18 22:50:53
Cats or Cubs with Pounce and these stats:
Beast type with power > 271, speed > 208, health < 1358
OR
Any type with power > 308, speed > 208
Black Tabby Cat (2-x-x) – Pounce > Pounce
Bombay Cat (2-x-x) – Pounce > Pounce
Calico Cat (2-x-x) – Pounce > Pounce
Cat (any breed) (2-x-x) – Pounce > Pounce
Cornish Rex Cat (2-x-x) – Pounce > Pounce
Darkmoon Cub (any breed) (2-x-x) – Pounce > Pounce
Feline Familiar (2-x-x) – Pounce > Pounce
Fluxfire Feline (PS breed only) (2-x-x) – Pounce > Pounce
Nightsaber Cub (2-x-x) – Pounce > Pounce
Orange Tabby Cat (2-x-x) – Pounce > Pounce
Panther Cub (2-x-x) – Pounce > Pounce
Sand Kitten (any breed) (2-x-x) – Pounce > Pounce
Siamese Cat (2-x-x) – Pounce > Pounce
Silver Tabby Cat (2-x-x) – Pounce > Pounce
Snow Cub (PP breed only) (2-x-x) – Pounce > Pounce
Winterspring Cub (2-x-x) – Pounce > Pounce
-----
-----
Spiders with Brittle Webbing and Spiderling Swarm and these stats:
Beast type with power > 231, speed > 208, health < 1358
OR
Any type with power > 277, speed > 208
(Note: Sticky Web effect does not work against Critter immunity, but Brittle Webbing effect does work)
Amethyst Spiderling (HP breed) (1-2-2) – Brittle Webbing > Spiderling Swarm
Ash Spiderling (BB breed) (1-2-2) – Brittle Webbing > Spiderling Swarm
Crystal Spider (BB breed) (1-2-2) – Brittle Webbing > Spiderling Swarm
Crystalline Broodling (BB, PS, SB, HB breeds) (1-2-2) – Brittle Webbing > Spiderling Swarm
Desert Spider (any breed) (1-2-2) – Brittle Webbing > Spiderling Swarm
Dusk Spiderling (any breed) (1-2-2) – Brittle Webbing > Spiderling Swarm
Feverbite Hatchling (any breed) (1-2-2) – Brittle Webbing > Spiderling Swarm
Forest Spiderling (any breed) (1-2-2) – Brittle Webbing > Spiderling Swarm
Jumping Spider (BB, SB, HB breeds) (1-2-2) – Brittle Webbing > Spiderling Swarm
Leyline Broodling (1-2-2) – Brittle Webbing > Spiderling Swarm
Nursery Spider (2-2-2) – Brittle Webbing > Spiderling Swarm
Smolderweb Hatchling (1-2-2) – Brittle Webbing > Spiderling Swarm
Spider (any breed) (1-2-2) – Brittle Webbing > Spiderling Swarm
Thornclaw Broodling (any breed) (1-2-2) – Brittle Webbing > Spiderling Swarm
Twilight Spider (any breed) (1-2-2) – Brittle Webbing > Spiderling Swarm
Venomspitter Hatchling (BB, SB breeds) (1-2-2) – Brittle Webbing > Spiderling Swarm
Vicious Broodling (1-2-2) – Brittle Webbing > Spiderling Swarm
Widow Spiderling (BB, PP, SB breeds) (1-2-2) – Brittle Webbing > Spiderling Swarm
-----
(edited)
Novo Comentário: