
| Humanoid Havoc | Draconic Destruction | Fierce Fliers | Unstoppable Undead | Critical Critters |
| Magical Mayhem | Elemental Escalation | Beast Blitz |  Aquatic Assault Aquatic Assault | Mechanical Melee |
Strategy added by Lazey
2
2
|
Average rating: |
5 |
|
Ratings: |
2 |
|
Your vote: |
|
Creator |
||||||||||
|---|---|---|---|---|---|---|---|---|---|---|
|
Tags
Filter strategies:
|
|||||||||
| 1 | 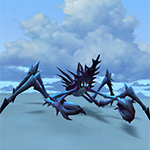


Any Level 25+ Aquatic
|

Reworked with 8.2 pet. The Skitterling/Hydraling combo makes quick work of Ruinhoof.
|
Script |
2 | 5.0 |
49 |
47
0:47
|
5 | ||
| 2 |


|
*** 9.0.2 approved ***
Origin of some changes to pets & abilities is unknown, so I reverted them to reflect my original strategy. Script added |
Breed Script |
2 | 5.0 |
2 |
98
1:38
|
11-12 | ||
| 3 | 

|
I used a PP Kelp Scuttler - unsure if other breeds will work too.
|
Breed |
2 | 5.0 |
0 |
75
1:15
|
8-9 | ||
| 4 | 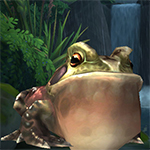
|
2 | 5.0 |
2 |
72
1:12
|
9 | ||||
| 5 |

Any Level 25+ Aquatic
|
2 | 0.0 |
0 |
65
1:05
|
7 | ||||
| 6 |

|
Other breeds may work but I didn't test it
|
Breed Script |
2 | 0.0 |
0 |
100
1:40
|
11-12 | ||
| 7 | 
|
Script |
2 | 0.0 |
0 |
70
1:10
|
7-9 |
Incl. steps:


Substitutes:
1 / 4
1 / 2

*** 9.0.2 approved ***
Origin of some changes to pets & abilities is unknown, so I reverted them to reflect my original strategy.
Script added
| Before | After | Experience Gain | |
|---|---|---|---|
| 1 | ➜ | 5 | 479 |
| 2 | ➜ | 5 | 508 |
| 3 | ➜ | 5 | 535 |
| 4 | ➜ | 6 | 558 |
| 5 | ➜ | 6 | 578 |
| 6 | ➜ | 7 | 594 |
| 7 | ➜ | 8 | 607 |
| 8 | ➜ | 9 | 617 |
| 9 | ➜ | 9 | 624 |
| 10 | ➜ | 10 | 627 |
| 11 | ➜ | 11 | 627 |
| 12 | ➜ | 12 | 624 |
| 13 | ➜ | 13 | 617 |
| 14 | ➜ | 14 | 607 |
| 15 | ➜ | 15 | 594 |
| 16 | ➜ | 16 | 578 |
| 17 | ➜ | 17 | 558 |
| 18 | ➜ | 18 | 535 |
| 19 | ➜ | 19 | 508 |
| 20 | ➜ | 20 | 479 |
| 21 | ➜ | 21 | 446 |
| 22 | ➜ | 22 | 409 |
| 23 | ➜ | 23 | 370 |
| 24 | ➜ | 24 | 327 |
|
Safari Hat |
|
|
Lesser Pet Treat |
|
|
Pet Treat |
|
|
Darkmoon Hat |
|
|
Pet Battle Week |
|
= |
Pet levels to 25 with minimal XP lost |
|
|
= |
Additional XP above level 25 is lost |
|
For the best display of your strategy, please follow these guidelines:


For the best display of your strategy, please follow these guidelines:
For the best display of your strategy, please follow these guidelines:
For the best display of your strategy, please follow these guidelines:
For the best display of your strategy, please follow these guidelines:
For the best display of your strategy, please follow these guidelines:
For the best display of your strategy, please follow these guidelines:
For the best display of your strategy, please follow these guidelines:
For the best display of your strategy, please follow these guidelines:
For the best display of your strategy, please follow these guidelines:
For the best display of your strategy, please follow these guidelines:

A little pedicure could go a long way to improve ones reputation.


 Tail Slap
 Shell Armor
 Call Lightning
 Bubble
 Swarm of Flies
 Swarm
Swarm Water Jet
1
asdasd wrote on 2019-09-01 01:59:19
Fen Crab - Rip, Blood in the Water, Rip, Rip, Pass (dies)
Mud Jumper - Bubble, Mudslide, Water jet till dead
Benax - Bubble, Mudslide, Water jet all the way (edited)
9
Tiggles
wrote on 2019-01-15 12:09:53
if [ self(#1).active ]
ability(#3)
ability(#2)
ability(#1)
endif
if [ self(#2).active ]
ability(#3)
ability(#1) [ weather(Lightning Storm) ]
ability(#2)
ability(#1)
endif
if [ self(#3).active ]
ability(#3)
ability(#1)
endif
change(next) [ self.dead ]
1
Grommet wrote on 2017-09-11 15:06:02
Fen Crab (P/P) 1-1-2
Gulp Forglet (B/B) 1-2-1
Swamp Croaker (H/B) 1-2-2
Fen Crab: Rip, Blood in the Water. Then Rip till Fen Crab dies.
Gulp Froglet: Toxic Skin, Swarm till Froglet dies.
Swamp Croaker: Water Jet till Ruinhoof dies.
Tried this tactics several times and worked every time.
0
Anonymous wrote on 2017-09-14 15:08:42
0
LN wrote on 2017-09-19 16:49:48
0
Cernunnas wrote on 2017-09-19 19:41:16
0
Anonymous wrote on 2017-09-20 13:57:04
0
Zarria wrote on 2017-10-18 07:12:00
0
Mesoceph wrote on 2017-12-02 22:07:54
1
Sunshany#2626
wrote on 2018-09-08 08:56:15
2
Wikanne wrote on 2018-06-28 21:40:02
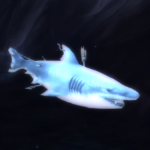
Toothy 1-1-2. Rip, then Shark bite then spam surge until he's dead.
Then use Swamp Croaker 1-1-2 Bubble, Water Jet, Croak, Water jet until dead
Mud Jumper 1-1-1 Bubble, Mudslide, Water Jet until win.
7
Eekwibble wrote on 2017-09-13 21:01:44
Turn 1. Rip
2. Blood in the Water
3. Rip
4. Rip
5. Pass
1st Crab dies
Bring in 2nd Crab
1. BitW
2+. Claw until your Crab dies
Bring in 3rd Crab
1. BitW
2+. Claw if necessary
0
Miaka-baka wrote on 2017-09-20 14:17:14
2
Argent wrote on 2017-10-14 15:01:23
1
Dhrali wrote on 2017-11-18 08:55:32
1
Ectothrix
wrote on 2017-12-29 12:25:28
1
ChakalT
wrote on 2018-01-10 09:28:35
1
Paww
wrote on 2018-04-10 13:53:34
2
Khes
wrote on 2018-04-06 09:40:21
0
Ruta wrote on 2018-02-09 08:17:29
0
Saffier wrote on 2017-12-30 06:44:23
Whirlpool - Call Lightning - Tail Slap until Hydraling dies - Bring in Ghostshell Crab - Whirlpool - Bubble - Grasp - Whirlpool - Crab dies - Bring in Left Shark - Water Jet - Swallow You Whole - end of fight
0
anonymous wrote on 2017-11-12 19:37:48
0
Torn wrote on 2017-08-29 15:03:36
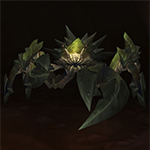
Hydraling 2-1-2 - Whirlpool, call Lighting, tail slap until Hydraling died
Benax - 1-1-1 - Bubble, water jet until call lightning from hydraling dropped, then mudslide and Ruinhoof was dead,
Didnt have Gulp, but didnt need it
RNG I suppose
0
Ofnir wrote on 2017-08-30 12:29:43
0
Illestra wrote on 2017-09-01 04:46:09
0
Aranesh
wrote on 2017-09-01 04:53:02
0
paranoid wrote on 2017-09-03 19:07:01
1
Kayllisti wrote on 2017-09-17 12:09:04
0
Yewfire wrote on 2017-09-12 07:55:51
0
Hannah wrote on 2017-09-09 23:37:51
THEN bring in Hydraling for Call Lightning with 100% debuff. Then Whirlpool. Hydra dies, brought in Mud Jumper (or Benax), Used Bubble, then Mudslide, and Whirlpool lands and kills him with your Benax or Mudjumper still at Full Health. Literally fool proof. Tried this strat 5 times in a row and worked perfect every time.
0
Wenchy wrote on 2017-09-12 03:35:51
0
Anonymous wrote on 2017-09-11 15:27:59
0
Saiko wrote on 2017-09-02 11:52:42
0
Nell wrote on 2017-10-09 10:55:07
Halbwüchsiger Krabbelrücken 1-1-2
Hydraling 2-1-1
Knurri 1-1-2
ist eig selbsterklärend immer schön die jeweilige fähigkeit zum schaden verringern als 1. benutzen ,dann zerfetzen und dann Blut im Wasser.Beim Hydraling hab ich die reihenfolge panzerrüstung,blitzschlag und dann schwanzschlag benutzt^^
1
Andy wrote on 2017-09-12 07:38:01
1
Thélurick
wrote on 2017-11-27 15:51:32
0
Триривла wrote on 2018-10-21 07:00:40
1
Anonymous wrote on 2017-09-06 12:27:56
0
Anonymous wrote on 2017-09-08 03:22:16
1
Nitania
wrote on 2018-05-24 12:34:21
0
AlexIs wrote on 2017-11-11 11:47:29
1
Nitania
wrote on 2018-05-24 12:33:40
1
erokon
wrote on 2018-04-09 15:18:24
3
Корридас wrote on 2017-11-03 19:34:47
0
Anonymous wrote on 2017-09-24 06:50:40
0
Anonymous wrote on 2017-09-20 12:45:56
0
Маорик wrote on 2017-09-11 08:02:32
-1
Туся wrote on 2017-09-03 10:42:05
New Comment: