^
vs. Natural Defenders

Strategy added by Lazey

14

14

Strategy 5 of 12
Browse all alternatives

Incl. steps:

Click the button to copy the script into your clipboard:

change(#3) [ self.aura(Decoy:333).exists ]
use(Cocoon Strike:506) [ round>2 ]
use(Bloodfang:917)
use(Bite:110)
use(Decoy:334) [ enemy(#3).active ]
use(Decoy:334) [ enemy(#2).active & enemy.hp<245 ]
use(Haywire:916) [ enemy.hp<1294 & self.power=325 ]
use(Haywire:916) [ enemy.hp<1159 & self.power=289 ]
use(Haywire:916) [ enemy.hp<1099 & self.power=273 ]
use(Haywire:916) [ enemy.hp<1051 & self.power=260 ]
use(Alpha Strike:504)
use(Shadowmeld:2253) [ enemy.aura(Void Tremors:2359).duration=1 ]
use(Void Tremors:2360) [ enemy(#3).active ]
use(Shadow Talon:1238)
standby
change(next)
Natural Defenders 173372
Special or not:0Special or not:1121246014382224600

Skills: 1 2 1
Breed: Any

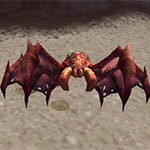
Voru'kar Leecher
This pet can have the following breeds:

Breed Health Power Speed
SS 1380 248 341


Special or not:0Special or not:112114037941014030

Skills: 1 2 1
Breed: Any

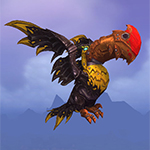
Mechanical Axebeak
This pet can have the following breeds:

Breed Health Power Speed
PP 1400 325 260
SS 1400 260 325
HP 1546 289 260
PB 1465 289 273
SB 1465 273 289


Special or not:0Special or not:1111287216364628720

Skills: 1 1 1
Breed: Any

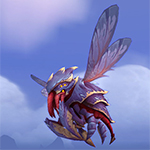
Shadowbarb Hatchling
This pet can have the following breeds:

Breed Health Power Speed
SS 1493 271 296


*** Created on Beta, so maybe not final ***

RNG heavy fight with chances to stun, interrupt turns, and too many Moth Balls' not missing, so maybe you'll have to repeat the fight several times with this strategy.

Low XP
At least one of the pets for this strategy require the use of a specific breed.
RNG
Not every strategy can be bullet proof. This is one of them. You might have to restart it, since there are some random elements that increase the risk of your pets failing. Don't blame them, please!
This strategy is using pets obtainable from the Wow Trading Card Game (TCG) or the auction house for potentially high sums of gold.
This strategy is using pets obtainable only from the WoW In-Game Shop for Battle.net Balance or real money.
You can use this strategy to carry a low level pet to give it experience.
Some instructions are more difficult to follow than others. That's exactly what you might find in this strategy!
Script
The strategy offers a Script that can be used with the Pet Battle Script addon. You can copy the script by clicking on the button to the left of the pets.
At least one pet in the strategy cannot be obtained anymore. If you have it, congrats!
A Strategy Curator found this strategy to be especially helpful and higlighted it with this tag to give it more exposure.
In Dragonflight Patch 10.2, the ability Time Bomb has been changed. This tag is marking strategies using Time Bomb so they can be reviewed.
Time: 1:56
This time was entered by a strategy curator. It is quite reliable especially when using TDScript, however times can always vary slightly.
Rounds: 18+
The number of rounds for this fight were added by a strategy curator. This number is usually very reliable.
This table shows the level increase for completing the fight with level 25 pets and one carry pet.
Partial level experience is not included in the calculation.

Before After Experience Gain
13239
24254
34267
45279
56289
66297
77304
88309
99312
1010314
1111314
1212312
1313309
1414304
1515297
1616289
1717279
1818267
1919254
2020239
2121223
2222205
2323185
2424163

Safari Hat

Lesser Pet Treat

Pet Treat

Darkmoon Hat

Pet Battle Week


Strategy Details
1 Min 56 Sec
This time was entered by a strategy curator. It is quite reliable especially when using TDScript, however times can always vary slightly.
18+
The number of rounds for this fight were added by a strategy curator. This number is usually very reliable.
2020-11-20 07:44:21
The strategy was last updated on this date.
2020-11-18 10:14:59
The strategy was created on this date.
23,602
Pageviews. This number indicates how often this strategy has been accessed by visitors.
Tamer Details
Ardenweald 58.2 56.9 (TomTom / Map Pin)
Low XP
This fight provides very low experience. It is usually not worth bringing a low level pet in. You can see detailed values by hovering over the XP tag.
Turn 1

For the best display of your strategy, please follow these guidelines:

  • Use QuickFill elements where possible
  • Enter custom instructions in English
  • Check the Strategy Creation Guide for more info
Voru'kar Leecher
Bite
Bloodfang
Cocoon Strike
Mechanical Axebeak
Alpha Strike
Haywire
Decoy
Shadowbarb Hatchling
Shadow Talon
Shadowmeld
Void Tremors
Pass
Bring in your Voru'kar Leecher
Bring in your Mechanical Axebeak
Bring in your Shadowbarb Hatchling
Swap to your Voru'kar Leecher
Swap to your Mechanical Axebeak
Swap to your Shadowbarb Hatchling
Slugger comes in
Runehoof comes in
Duster comes in
An enemy pet comes in
Any standard attack will finish the fight
 
Voru'kar Leecher
Mechanical Axebeak
Shadowbarb Hatchling
Bite
Bloodfang
Cocoon Strike
Alpha Strike
Haywire
Decoy
Shadow Talon
Shadowmeld
Void Tremors
Duster
Runehoof
Slugger
Turn 2

For the best display of your strategy, please follow these guidelines:

  • Use QuickFill elements where possible
  • Enter custom instructions in English
  • Check the Strategy Creation Guide for more info
Voru'kar Leecher
Bite
Bloodfang
Cocoon Strike
Mechanical Axebeak
Alpha Strike
Haywire
Decoy
Shadowbarb Hatchling
Shadow Talon
Shadowmeld
Void Tremors
Pass
Bring in your Voru'kar Leecher
Bring in your Mechanical Axebeak
Bring in your Shadowbarb Hatchling
Swap to your Voru'kar Leecher
Swap to your Mechanical Axebeak
Swap to your Shadowbarb Hatchling
Slugger comes in
Runehoof comes in
Duster comes in
An enemy pet comes in
Any standard attack will finish the fight
 
Voru'kar Leecher
Mechanical Axebeak
Shadowbarb Hatchling
Bite
Bloodfang
Cocoon Strike
Alpha Strike
Haywire
Decoy
Shadow Talon
Shadowmeld
Void Tremors
Duster
Runehoof
Slugger
Now follow these priorities until dead:

For the best display of your strategy, please follow these guidelines:

  • Use QuickFill elements where possible
  • Enter custom instructions in English
  • Check the Strategy Creation Guide for more info
Voru'kar Leecher
Bite
Bloodfang
Cocoon Strike
Mechanical Axebeak
Alpha Strike
Haywire
Decoy
Shadowbarb Hatchling
Shadow Talon
Shadowmeld
Void Tremors
Pass
Bring in your Voru'kar Leecher
Bring in your Mechanical Axebeak
Bring in your Shadowbarb Hatchling
Swap to your Voru'kar Leecher
Swap to your Mechanical Axebeak
Swap to your Shadowbarb Hatchling
Slugger comes in
Runehoof comes in
Duster comes in
An enemy pet comes in
Any standard attack will finish the fight
 
Voru'kar Leecher
Mechanical Axebeak
Shadowbarb Hatchling
Bite
Bloodfang
Cocoon Strike
Alpha Strike
Haywire
Decoy
Shadow Talon
Shadowmeld
Void Tremors
Duster
Runehoof
Slugger
Prio 1

For the best display of your strategy, please follow these guidelines:

  • Use QuickFill elements where possible
  • Enter custom instructions in English
  • Check the Strategy Creation Guide for more info
Voru'kar Leecher
Bite
Bloodfang
Cocoon Strike
Mechanical Axebeak
Alpha Strike
Haywire
Decoy
Shadowbarb Hatchling
Shadow Talon
Shadowmeld
Void Tremors
Pass
Bring in your Voru'kar Leecher
Bring in your Mechanical Axebeak
Bring in your Shadowbarb Hatchling
Swap to your Voru'kar Leecher
Swap to your Mechanical Axebeak
Swap to your Shadowbarb Hatchling
Slugger comes in
Runehoof comes in
Duster comes in
An enemy pet comes in
Any standard attack will finish the fight
 
Voru'kar Leecher
Mechanical Axebeak
Shadowbarb Hatchling
Bite
Bloodfang
Cocoon Strike
Alpha Strike
Haywire
Decoy
Shadow Talon
Shadowmeld
Void Tremors
Duster
Runehoof
Slugger
Prio 2

For the best display of your strategy, please follow these guidelines:

  • Use QuickFill elements where possible
  • Enter custom instructions in English
  • Check the Strategy Creation Guide for more info
Voru'kar Leecher
Bite
Bloodfang
Cocoon Strike
Mechanical Axebeak
Alpha Strike
Haywire
Decoy
Shadowbarb Hatchling
Shadow Talon
Shadowmeld
Void Tremors
Pass
Bring in your Voru'kar Leecher
Bring in your Mechanical Axebeak
Bring in your Shadowbarb Hatchling
Swap to your Voru'kar Leecher
Swap to your Mechanical Axebeak
Swap to your Shadowbarb Hatchling
Slugger comes in
Runehoof comes in
Duster comes in
An enemy pet comes in
Any standard attack will finish the fight
 
Voru'kar Leecher
Mechanical Axebeak
Shadowbarb Hatchling
Bite
Bloodfang
Cocoon Strike
Alpha Strike
Haywire
Decoy
Shadow Talon
Shadowmeld
Void Tremors
Duster
Runehoof
Slugger
Prio 3

For the best display of your strategy, please follow these guidelines:

  • Use QuickFill elements where possible
  • Enter custom instructions in English
  • Check the Strategy Creation Guide for more info
Voru'kar Leecher
Bite
Bloodfang
Cocoon Strike
Mechanical Axebeak
Alpha Strike
Haywire
Decoy
Shadowbarb Hatchling
Shadow Talon
Shadowmeld
Void Tremors
Pass
Bring in your Voru'kar Leecher
Bring in your Mechanical Axebeak
Bring in your Shadowbarb Hatchling
Swap to your Voru'kar Leecher
Swap to your Mechanical Axebeak
Swap to your Shadowbarb Hatchling
Slugger comes in
Runehoof comes in
Duster comes in
An enemy pet comes in
Any standard attack will finish the fight
 
Voru'kar Leecher
Mechanical Axebeak
Shadowbarb Hatchling
Bite
Bloodfang
Cocoon Strike
Alpha Strike
Haywire
Decoy
Shadow Talon
Shadowmeld
Void Tremors
Duster
Runehoof
Slugger

For the best display of your strategy, please follow these guidelines:

  • Use QuickFill elements where possible
  • Enter custom instructions in English
  • Check the Strategy Creation Guide for more info
Voru'kar Leecher
Bite
Bloodfang
Cocoon Strike
Mechanical Axebeak
Alpha Strike
Haywire
Decoy
Shadowbarb Hatchling
Shadow Talon
Shadowmeld
Void Tremors
Pass
Bring in your Voru'kar Leecher
Bring in your Mechanical Axebeak
Bring in your Shadowbarb Hatchling
Swap to your Voru'kar Leecher
Swap to your Mechanical Axebeak
Swap to your Shadowbarb Hatchling
Slugger comes in
Runehoof comes in
Duster comes in
An enemy pet comes in
Any standard attack will finish the fight
 
Voru'kar Leecher
Mechanical Axebeak
Shadowbarb Hatchling
Bite
Bloodfang
Cocoon Strike
Alpha Strike
Haywire
Decoy
Shadow Talon
Shadowmeld
Void Tremors
Duster
Runehoof
Slugger
Bring in your Mechanical Axebeak

For the best display of your strategy, please follow these guidelines:

  • Use QuickFill elements where possible
  • Enter custom instructions in English
  • Check the Strategy Creation Guide for more info
Voru'kar Leecher
Bite
Bloodfang
Cocoon Strike
Mechanical Axebeak
Alpha Strike
Haywire
Decoy
Shadowbarb Hatchling
Shadow Talon
Shadowmeld
Void Tremors
Pass
Bring in your Voru'kar Leecher
Bring in your Mechanical Axebeak
Bring in your Shadowbarb Hatchling
Swap to your Voru'kar Leecher
Swap to your Mechanical Axebeak
Swap to your Shadowbarb Hatchling
Slugger comes in
Runehoof comes in
Duster comes in
An enemy pet comes in
Any standard attack will finish the fight
 
Voru'kar Leecher
Mechanical Axebeak
Shadowbarb Hatchling
Bite
Bloodfang
Cocoon Strike
Alpha Strike
Haywire
Decoy
Shadow Talon
Shadowmeld
Void Tremors
Duster
Runehoof
Slugger
Prio 1
Decoy (if Duster is active, when created swap to your Shadowbarb Hatchling immediately)

For the best display of your strategy, please follow these guidelines:

  • Use QuickFill elements where possible
  • Enter custom instructions in English
  • Check the Strategy Creation Guide for more info
Voru'kar Leecher
Bite
Bloodfang
Cocoon Strike
Mechanical Axebeak
Alpha Strike
Haywire
Decoy
Shadowbarb Hatchling
Shadow Talon
Shadowmeld
Void Tremors
Pass
Bring in your Voru'kar Leecher
Bring in your Mechanical Axebeak
Bring in your Shadowbarb Hatchling
Swap to your Voru'kar Leecher
Swap to your Mechanical Axebeak
Swap to your Shadowbarb Hatchling
Slugger comes in
Runehoof comes in
Duster comes in
An enemy pet comes in
Any standard attack will finish the fight
 
Voru'kar Leecher
Mechanical Axebeak
Shadowbarb Hatchling
Bite
Bloodfang
Cocoon Strike
Alpha Strike
Haywire
Decoy
Shadow Talon
Shadowmeld
Void Tremors
Duster
Runehoof
Slugger
Prio 2
Haywire (if enemy HP dropped below 2x tooltip damage, stuns/interrupts ignored)

For the best display of your strategy, please follow these guidelines:
  • Use QuickFill elements where possible
  • Enter custom instructions in English
  • Check the Strategy Creation Guide for more info
Voru'kar Leecher
Bite
Bloodfang
Cocoon Strike
Mechanical Axebeak
Alpha Strike
Haywire
Decoy
Shadowbarb Hatchling
Shadow Talon
Shadowmeld
Void Tremors
Pass
Bring in your Voru'kar Leecher
Bring in your Mechanical Axebeak
Bring in your Shadowbarb Hatchling
Swap to your Voru'kar Leecher
Swap to your Mechanical Axebeak
Swap to your Shadowbarb Hatchling
Slugger comes in
Runehoof comes in
Duster comes in
An enemy pet comes in
Any standard attack will finish the fight
 
Voru'kar Leecher
Mechanical Axebeak
Shadowbarb Hatchling
Bite
Bloodfang
Cocoon Strike
Alpha Strike
Haywire
Decoy
Shadow Talon
Shadowmeld
Void Tremors
Duster
Runehoof
Slugger
Prio 3

For the best display of your strategy, please follow these guidelines:
  • Use QuickFill elements where possible
  • Enter custom instructions in English
  • Check the Strategy Creation Guide for more info
Voru'kar Leecher
Bite
Bloodfang
Cocoon Strike
Mechanical Axebeak
Alpha Strike
Haywire
Decoy
Shadowbarb Hatchling
Shadow Talon
Shadowmeld
Void Tremors
Pass
Bring in your Voru'kar Leecher
Bring in your Mechanical Axebeak
Bring in your Shadowbarb Hatchling
Swap to your Voru'kar Leecher
Swap to your Mechanical Axebeak
Swap to your Shadowbarb Hatchling
Slugger comes in
Runehoof comes in
Duster comes in
An enemy pet comes in
Any standard attack will finish the fight
 
Voru'kar Leecher
Mechanical Axebeak
Shadowbarb Hatchling
Bite
Bloodfang
Cocoon Strike
Alpha Strike
Haywire
Decoy
Shadow Talon
Shadowmeld
Void Tremors
Duster
Runehoof
Slugger

For the best display of your strategy, please follow these guidelines:
  • Use QuickFill elements where possible
  • Enter custom instructions in English
  • Check the Strategy Creation Guide for more info
Voru'kar Leecher
Bite
Bloodfang
Cocoon Strike
Mechanical Axebeak
Alpha Strike
Haywire
Decoy
Shadowbarb Hatchling
Shadow Talon
Shadowmeld
Void Tremors
Pass
Bring in your Voru'kar Leecher
Bring in your Mechanical Axebeak
Bring in your Shadowbarb Hatchling
Swap to your Voru'kar Leecher
Swap to your Mechanical Axebeak
Swap to your Shadowbarb Hatchling
Slugger comes in
Runehoof comes in
Duster comes in
An enemy pet comes in
Any standard attack will finish the fight
 
Voru'kar Leecher
Mechanical Axebeak
Shadowbarb Hatchling
Bite
Bloodfang
Cocoon Strike
Alpha Strike
Haywire
Decoy
Shadow Talon
Shadowmeld
Void Tremors
Duster
Runehoof
Slugger

For the best display of your strategy, please follow these guidelines:

  • Use QuickFill elements where possible
  • Enter custom instructions in English
  • Check the Strategy Creation Guide for more info
Voru'kar Leecher
Bite
Bloodfang
Cocoon Strike
Mechanical Axebeak
Alpha Strike
Haywire
Decoy
Shadowbarb Hatchling
Shadow Talon
Shadowmeld
Void Tremors
Pass
Bring in your Voru'kar Leecher
Bring in your Mechanical Axebeak
Bring in your Shadowbarb Hatchling
Swap to your Voru'kar Leecher
Swap to your Mechanical Axebeak
Swap to your Shadowbarb Hatchling
Slugger comes in
Runehoof comes in
Duster comes in
An enemy pet comes in
Any standard attack will finish the fight
 
Voru'kar Leecher
Mechanical Axebeak
Shadowbarb Hatchling
Bite
Bloodfang
Cocoon Strike
Alpha Strike
Haywire
Decoy
Shadow Talon
Shadowmeld
Void Tremors
Duster
Runehoof
Slugger
Turn 1

For the best display of your strategy, please follow these guidelines:

  • Use QuickFill elements where possible
  • Enter custom instructions in English
  • Check the Strategy Creation Guide for more info
Voru'kar Leecher
Bite
Bloodfang
Cocoon Strike
Mechanical Axebeak
Alpha Strike
Haywire
Decoy
Shadowbarb Hatchling
Shadow Talon
Shadowmeld
Void Tremors
Pass
Bring in your Voru'kar Leecher
Bring in your Mechanical Axebeak
Bring in your Shadowbarb Hatchling
Swap to your Voru'kar Leecher
Swap to your Mechanical Axebeak
Swap to your Shadowbarb Hatchling
Slugger comes in
Runehoof comes in
Duster comes in
An enemy pet comes in
Any standard attack will finish the fight
 
Voru'kar Leecher
Mechanical Axebeak
Shadowbarb Hatchling
Bite
Bloodfang
Cocoon Strike
Alpha Strike
Haywire
Decoy
Shadow Talon
Shadowmeld
Void Tremors
Duster
Runehoof
Slugger
Turn 2

For the best display of your strategy, please follow these guidelines:

  • Use QuickFill elements where possible
  • Enter custom instructions in English
  • Check the Strategy Creation Guide for more info
Voru'kar Leecher
Bite
Bloodfang
Cocoon Strike
Mechanical Axebeak
Alpha Strike
Haywire
Decoy
Shadowbarb Hatchling
Shadow Talon
Shadowmeld
Void Tremors
Pass
Bring in your Voru'kar Leecher
Bring in your Mechanical Axebeak
Bring in your Shadowbarb Hatchling
Swap to your Voru'kar Leecher
Swap to your Mechanical Axebeak
Swap to your Shadowbarb Hatchling
Slugger comes in
Runehoof comes in
Duster comes in
An enemy pet comes in
Any standard attack will finish the fight
 
Voru'kar Leecher
Mechanical Axebeak
Shadowbarb Hatchling
Bite
Bloodfang
Cocoon Strike
Alpha Strike
Haywire
Decoy
Shadow Talon
Shadowmeld
Void Tremors
Duster
Runehoof
Slugger
Turn 3

For the best display of your strategy, please follow these guidelines:

  • Use QuickFill elements where possible
  • Enter custom instructions in English
  • Check the Strategy Creation Guide for more info
Voru'kar Leecher
Bite
Bloodfang
Cocoon Strike
Mechanical Axebeak
Alpha Strike
Haywire
Decoy
Shadowbarb Hatchling
Shadow Talon
Shadowmeld
Void Tremors
Pass
Bring in your Voru'kar Leecher
Bring in your Mechanical Axebeak
Bring in your Shadowbarb Hatchling
Swap to your Voru'kar Leecher
Swap to your Mechanical Axebeak
Swap to your Shadowbarb Hatchling
Slugger comes in
Runehoof comes in
Duster comes in
An enemy pet comes in
Any standard attack will finish the fight
 
Voru'kar Leecher
Mechanical Axebeak
Shadowbarb Hatchling
Bite
Bloodfang
Cocoon Strike
Alpha Strike
Haywire
Decoy
Shadow Talon
Shadowmeld
Void Tremors
Duster
Runehoof
Slugger

Noooo, I'll never get the glitter out of my fur!


Xade-Kazzak wrote on 2021-04-24 08:22:15

Completely useless, can't even remotely kill the last pet.

RockwellH

wrote on 2020-12-19 12:02:28

won on first try the rng god was on my side

Lorianth#1672

wrote on 2020-12-09 21:11:04

Took a couple tries, but eventually this strategy worked for me. Thanks!

Cuse1331

wrote on 2020-12-03 19:10:02

I didn't have Voru'kar leecher, instead I used Shimmering Aquafly (1,2,2) SB. This worked like a charm and Shimmering Aquafly almost solod the first two pets. I saved dodge for turn 3 when the opponent burrows and used Barbed Stinger unless the poisoned worked and then I used Puncture wound. Used the same other two pets. Worked Great.

Serendipitus

wrote on 2020-12-05 22:16:55

Good suggestion. I used a Shimmering Aquafly PS, followed your lead, and once dead followed directions as much as possible. Was messy, but a certain win. Thanks.

New Comment:


Name:

Link: